Monday, 23 June 2025

Deploying Sitecore XM Cloud Frontend (Next.js) on Vercel

June 23, 2025 0

In my previous blog, I discussed how we can deploy a Sitecore XM Cloud frontend built with Next.js to Netlify.
Today, we'll explore how to deploy the XM Cloud frontend on Vercel—a cloud-based platform officially recommended by Sitecore for Jamstack-based Next.js deployments.

In this post, we’ll walk through the steps to deploy a website integrated with Sitecore XM Cloud using Vercel.

Prepare the GitHub Repository

  1. Create a public GitHub repository and commit/push your code.

  2. Set environment-specific values in the .env file.

  3. If you’ve made content or layout changes in your local XM environment, use the Sitecore CLI to publish those changes and verify that the content is available on Experience Edge.

  4. In your XM Cloud instance, publish all content and layout changes you want reflected on the live site.

Connect Your GitHub Repository to Vercel

  1. Sign in to Vercel at vercel.com.


  2. You can log in using GitHub authentication, or navigate to:
    Profile Icon → Account Settings → Authentication to connect GitHub manually.


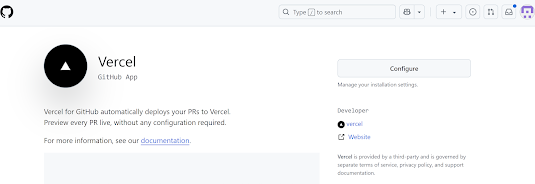
  3. It is recommended to install the Vercel GitHub App by visiting: https://github.com/apps/vercel

    • Click on Configure


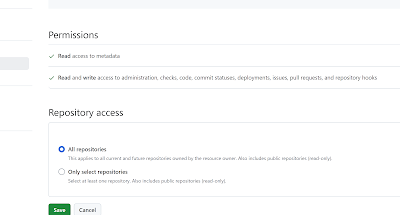
    • Select Github Account

    • Grant access to your GitHub account and repositories.


Skipping above steps may lead to deployment issues.

Deployment Setup in Vercel

  1. Go to the Vercel Dashboard → Add New → Project

  2. Click "Continue with GitHub", then select your GitHub account and the desired repository.


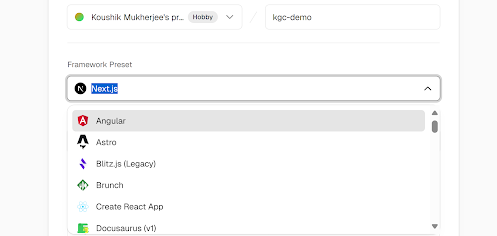
  3. Provide a project name.


  4. Choose the framework preset — in our case, select Next.js.


  5. Set the Root Directory to headapps/nextjs-starter.


6. Add Environment Variables

Manually add the following environment variables as key-value pairs (or import from .env):

PUBLIC_URL
GRAPH_QL_ENDPOINT
SITECORE_API_HOST
SITECORE_SITE_NAME
SITECORE_API_KEY
SITECORE_EDGE_CONTEXT_ID


7. Once done, click "Deploy".

Live Deployment

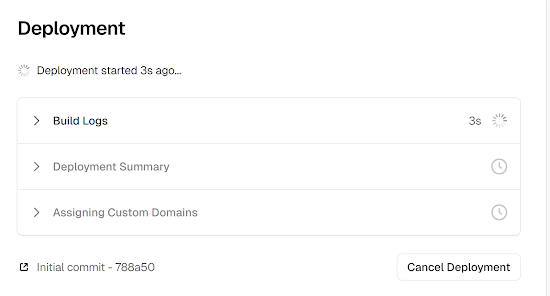
  • Vercel will now show the deployment progress in real-time.


  • It automatically optimizes your Next.js app, including static generation and serverless functions.

  • Once deployment completes, Vercel provides an instant preview URL for your live app.


  • You can also configure a custom domain via the "Add Domain" page in the dashboard.


Conclusion

Deploying a Sitecore XM Cloud integrated Next.js application on Vercel is a straightforward and efficient process. With Vercel's seamless GitHub integration, real-time deployment previews, and built-in support for modern frameworks like Next.js, it offers a developer-friendly and scalable solution for headless CMS deployments. By properly configuring environment variables and deployment settings, you can ensure a smooth and automated workflow for your frontend delivery.

References


Tuesday, 17 June 2025

Deploying Sitecore XM Cloud Integrated Next.js Apps on Netlify with Automated Edge Updates

June 17, 2025 0

Netlify and Vercel are two cloud-based platforms in the JamStack ecosystem that are officially recommended by Sitecore for deploying frontend (Next.js) applications. These platforms support both Server Side Rendering (SSR) and Static Site Generation (SSG).

In this blog, we’ll walk through the steps to deploy a website integrated with Sitecore XM Cloud using Netlify, which offers first-class support for Next.js.

Prepare the GitHub Repository

  1. Create a public GitHub repository and commit/push your code.

  2. Set environment-specific values in the .env file.

  3. If you’ve made content or layout changes in your local XM environment, use the Sitecore CLI to publish your changes and verify the content is available on the Experience Edge.

  4. In your XM Cloud instance, publish all changes you want reflected on your live site.


Continuous Deployment Setup in Netlify

  1. Register and create a free Netlify account, then log in.

  2. Click "Add new project" and choose "Import an existing project".


  3. Since the Next.js project is hosted on GitHub, select "GitHub" and authorize your account.


  4. Select the repository you wish to deploy.

  5. Once selected, Netlify will detect it as a Next.js project and populate the default build settings.
    In our case, the Next.js app resides under headapps/nextjs-starter, so update the path accordingly.

    • Build command:
      npm run build

    • Publish directory:
      headapps/nextjs-starter/.next


  6. Set the environment variables manually using key-value pairs (or import from .env). The required variables are:

    FETCH_WITH
    GRAPH_QL_ENDPOINT SITECORE_API_HOST SITECORE_SITE_NAME SITECORE_API_KEY SITECORE_EDGE_CONTEXT_ID

  7. Click "Deploy site". If the deployment is successful, you’ll see a deployment log similar to this:


  8. Once deployment is complete, verify that the deployed app is rendering correctly on Netlify.


Configure Webhooks to Redeploy on Content Update

To automate redeployments of your Next.js app when new content is published to the Edge Delivery Platform, configure webhooks:

  1. In Netlify, navigate to:
    Project settings > Build & deploy > Continuous deployment > Build hooks

    • Provide a name like "experience edge"

    • A unique build hook URL will be generate

  2. Open the Experience Edge Admin API URL and set up authentication.

  3. To generate a bearer token, make a POST request to:
    https://auth.sitecorecloud.io/oauth/token
    Include the following in the request body:

    audience: https://api.sitecorecloud.io
    grant_type: client_credentials client_id: <your-client-id> client_secret: <your-client-secret>

  4. You can create the client ID and client secret from XM Cloud Deploy App under:
    Credentials > Environment.
    Provide a label, and select your project and environment to generate the credentials.


  5. Send a POST request to the webhook creation endpoint using Postman:

https://edge.sitecorecloud.io/api/admin/v1/webhooks

Request body:

json
{
"label": "Netlify Deploy",
"uri": "<your-netlify-build-hook-url>",
"method": "POST",
"headers": {
"Authorization": "Bearer <edge-authentication-token>",
"Content-Type": "application/json"
}
}
        You should receive a 201 Created response to confirm success.

    6. Now, update some content in XM Cloud (e.g., change the title from "L&G Consultancy" to                "L&G Consultancy LLP") and publish.

    7. Within a few seconds, you’ll see a new deploy triggered from Experience Edge under the Deploys         section in Netlify.


    8. Finally, verify that the updated content is visible on your live site.

Conclusion

Deploying a Next.js application integrated with Sitecore XM Cloud on Netlify is a streamlined and efficient process, especially with built-in support for continuous deployment and Experience Edge. By configuring environment variables and webhooks properly, you can ensure your site is always up-to-date with the latest published content. This setup offers a scalable and developer-friendly approach to modern Jamstack deployments backed by enterprise-grade CMS capabilities.

References


Friday, 6 June 2025

Building Audience Segment and Setup For XM Cloud Embedded Personalization

June 06, 2025 0


Welcome to my new blog where I'll explore the audience segment building in Sitecore XM Cloud embedded personalization. Here, I'll also explore the wide array of pre-defined condition templates available, giving you a variety of targeting options for easy personalization. In my previous blog I explain on how we can create Page Variants and implement personalization in page variants.

Audience Builder in XM Cloud Personalize

Personalize in XM Cloud enables you to define tailored conditions to target specific audiences and deliver personalized experiences. The Audience Builder offers a user-friendly interface with ready-to-use, pre-defined personalization conditions. These help marketers create personalized experiences effortlessly in a low- or no-code environment.


Mode Selector

Build Mode: Allows us to create or edit your audience while designing a page variant.

Preview Mode: Displays the conditions in an easy-to-read format and shows the order of execution.

Condition Editor

Clicking on “Add first condition” opens a list of pre-defined condition templates in the right pane. We can select templates from this list and add them to the Condition Editor to build your target audience.


Condition Template in Audience Builder

1. Click on "Add First Condition" will open the Condition Template. Here we can select predefine conditions from the list.

2. Search Bar: We can use search bar to find specific condition templates we want to use. The list will display templates with names or descriptions matching your search term.

3. Tags: Use the tag selector to filter condition templates based on specific tags:
  • Date
  • Device
  • Geo
  • Point of sale
  • User interaction
  • Visit
This simplifies the process of finding templates relevant to our target audience's requirements. 

4. Pre-Defined Condition Templates

Condition templates are easy-to-use tools for defining audience segments based on factors like location, device, and website behavior. They help deliver personalized content effortlessly. Each template includes a name, description, configurable variables, and a category. Below are the available pre-defined templates:

Country Region

This personalization is triggered when a user visits from a specific country (e.g., India) and region (e.g., Mumbai). Multiple regions within a country can be selected.


Date and Time (Organization time zone)

This personalization is triggered when a user visit is before or after a specific date and time, based on our organization's time zone.


Time of day (Organization time zone)

This personalization is triggered when a user visit is before or after a specific time, based on our organization's time zone.


Point of Sale

This personalization is triggered for a specific point of sale. Point(s) of sale is a list field where you select name(s) of the point of sale you wish to target.


Region

This personalization is triggered when a user visits from a specific region (e.g., North America). Multiple regions within can be selected.


Country

This personalization is triggered when a user visits from a specific country (e.g., India). Multiple countries can be selected.


Visit day of the month (organization time zone)

This personalization is triggered when a user visit on a specific day of a month, based on our organization's time zone.


Visit day of the week (organization time zone)

This personalization is triggered when a user visit on a specific day(s) of a week, based on our organization's time zone.


Month of visit (organization time zone)

This personalization is triggered when a user visit on a specific month(s), based on our organization's time zone.


UTM Value

This personalization is triggered when a specific UTM parameter matches a defined value—for example, campaign equals "Early Birds Promo." Supported fields include campaign, source, medium, and content. UTM values can contain letters, numbers, and special characters.


First Referrer

This personalization is triggered when the visitor’s first referrer URL matches a specified value, such as https://www.google.com . The referrer is a free-text field that supports letters, numbers, and special characters.


Operating System

This personalization is triggered when a user visits from a specific operating system.
Operating systems include: macOS, Windows, Android, iOS, Linux OS, Other. If the user agent is null or undefined, this condition returns false (even if Other is selected).


Device

This personalization is triggered when a user visits from a specific device type. Multiple countries can be selected. Device types include: mobile, desktop, tablet, other.


First Page

This personalization is triggered when the visitor starts their session on a specific page (e.g., a landing page). The page field accepts free-text input with letters, numbers, and special characters. Only one page can be specified.


Number of Page Views

This personalization is triggered when the visitor has viewed a specific page a certain number of times within a defined period (up to 30 days). The page field accepts free-text input with letters, numbers, and special characters. Only one page can be specified. The visit count can be any whole number, including zero.


Page view

This personalization is triggered when the visitor has viewed a specific page. The page name field accepts free-text input with letters, numbers, and special characters. Multiple pages can be specified.


New or Returning Visitor

 This personalization is triggered when the visitor is a specific type. Visitor type can be new or returning.


Variables for Condition Templates


After adding a condition template to an audience, we must define its details using input options, also known as variables.


Depending on the selected condition template, available variables may include:

  • Boolean options: is / is not, has / has not
  • Free text: Letters, numbers, and special characters
  • Predefined lists: Point of sale, country, region, day of week, month, UTM type, device type, operating system, visitor type
  • Comparison operators: is equal to, greater than, less than, greater than or equal to, less than or equal to, in between, include any of, contains, starts with, ends with, is null
  • Spin button values: Ranges from 0–30 or any positive/negative number
We hope this blog helps you fine-tune your audience building and targeting using condition templates. By leveraging the various variables in each template, you can improve the accuracy of reaching your target audience.