Showing posts with label Sitecore Setup. Show all posts

Thursday, 11 January 2024

Install Sitecore Experience Accelerator - Powershell Script

January 11, 2024 0


To install the Sitecore PowerShell package, follow these steps:

  1. Step 1: Download the Sitecore Package or zip file to your hard drive from https://dev.sitecore.net/Downloads/Sitecore_Experience_Accelerator.aspx.


    Step 2: Then log in to the Sitecore Panel where you intend to install the Sitecore Package and go to the Desktop.
    Step 3:Now click on the Start Icon, navigate to Development Tools, and select Installation Wizard. In the Installation Package window, click on the upload button, prompting a file selection popup window.
    Step 4:Upload Sitecore PowerShell package from your machine to the respective location and click the next button.
  • Ensure to select the "Overwrite existing files" checkbox to overwrite Sitecore items if they already exist in the Sitecore environment.
  • Click on the upload button and select close in the next window.


  1. Step 5: Click on the Next button, review all the information in the subsequent windows, and select the Install button.

  • Accept license agreement.

  • Check only if you are using SXA

  • Click on Install

  1. Once done, choose the "Restart Sitecore Client" checkbox and click on the close button.

Now you should view "Powershell ISE" and "Powershell Reports" icon in Launchpad.


Happy Sitecoreing!

Monday, 28 August 2023

Step by step guide to install and configure Sitecore CLI

August 28, 2023 0

Sitecore Serialization refers to a process within the Sitecore web content management system (CMS)that allows developers to save and retrieve Sitecore items and their associated data in a structured format. This process is commonly used for version control, content deployment, and collaboration in Sitecore development projects.

Sitecore Serialization essentially involves converting Sitecore items, which are the building blocks of content within the CMS, into files that can be stored in a version control system, such as Git. These files typically include configuration data, templates, layouts, renderings, and other relevant information about the Sitecore items. 

There are many tools available that provide Sitecore Serialization for content management in different types of machines and environments.

  • TDS
  • UNICORN
  • SITECORE CLI

The objective of this post is to provide a step-by-step guide to setting up Sitecore CLI in your solution.

Prerequisites:

Please ensure that you are working with Sitecore version 10.0 or later, as Sitecore CLI is not available for earlier versions. Additionally, you will need to have .NET Core 3.1 or a later version installed on your server. 

Step 1: Install Sitecore Management Services package 

·        Download Sitecore Management Services package from the URL: https://dev.sitecore.net/Downloads/Sitecore_CLI.aspx 

·        Now, Install the package on Sitecore instance using Sitecore Control Panel > Install a package.


Step 2: Install the Sitecore CLI

The Sitecore CLI requires .NET Core. Open a command prompt and run "dotnet --list-sdks". If you see the version as 3.1 (For me, the version is 6) or above, you are ready to proceed.

Now, open PowerShell as an administrator and navigate to the Visual Studio solution folder. Install the CLI by executing the following script:

dotnet new tool-manifest
dotnet nuget add source -n Sitecore https://sitecore.myget.org/F/sc-packages/api/v3/index.json
dotnet tool install Sitecore.CLI --add-source https://sitecore.myget.org/F/sc-packages/api/v3/index.json


Step 3:Initialize Sitecore CLI

Next, initialize your new serialization project by entering the following in the terminal:

dotnet sitecore init


This action will generate the Sitecore.json file.


Step 4: Connecting to Sitecore

To connect to a Sitecore instance type in the following command:

dotnet sitecore login --authority https://<Sitecore identity server> --cm https://<Sitecore instance> --allow-write true
Upon executing the above command, a login screen will open up in your browser.


After successfully logging in, you are ready to perform serialization (push, pull), and database publishing using the commands below.


You can use either the "ser" or "serialization" command to pull or push the data.
dotnet sitecore ser pull
dotnet sitecore ser push


During the setup process, I encountered the following error related to the installation of the CLI plugin version. Please find the error details and the solution below:

Solution: Check the plugin versions using the "Sitecore plugins list" command. Then update plugins with the latest version using the following command:

Sitecore plugins init --overwrite


Conclusion

To serialize Sitecore items, you can install and configure Sitecore CLI by following the steps provided above.

Thursday, 17 August 2023

Setup issue with Sitecore 10.3 in Windows 11 development machine

August 17, 2023 0


I was doing  Sitecore 10.3 setup in my local development environment. And I encountered the bellow  issue while doing the setup-

Problem Statement 1:

Certificate chain was issued by an authority that is not trusted.


Solution:

After attempting to address the issue, I explored suggestions on Sitecore Stack Exchange (installation - Sitecore 9.3 Installing on Windows 11 returns "certificate chain was issued by an authority that is not trusted." error - Sitecore Stack Exchange). Implementing these suggestions proved effective in resolving the problem. The details are provided below:

The problem stemmed from the "sitecore-XP0.json" file. The root of the issue lay in the presence of InvokeSqlcmd statements within the file. To rectify this, it was necessary to include "TrustServerCertificate": true within those statements.


Furthermore, within SQL Server Management Studio (SSMS), ensure to check the "Trust server certificate" checkbox.


Once all these steps have been successfully completed, you are ready to initiate the Sitecore 10.3 installation process.

Friday, 21 July 2023

Sitecore XMCloud Setup on Development Machine - Part 2

July 21, 2023 1

In my previous blog, I explained how to deploy an existing project to the XM Cloud portal. Now, in this blog, we will connect the Next.js application directly to the XM cloud application through the Experience Edge endpoint.

Prerequisites:

  • You must have one Organization account in Sitecore portal (https://portal.sitecorecloud.io/ ) which has access to XMCloud.  And your account should be associated with that Organization account with admin access. 
  • Install .Net SDK 6.0 or higher and runtime.

Please view the video for step by step guidance on XMCloud installation on local development machine

Please check the below blog to find the error I faced during the setup-

XMCloud Troubleshooting blog

FAQ

  • Can I migrate my existing XP project to XM cloud?

    Moving a large complex Sitecore XP site to XMCloud is not recommended. But if you want to move to Headless , you have less dependencies on xDB and have less or no custom logic then you can migrate your project to XM Cloud. 

  • How much time till take to craete a XM site from scratch?

    It will take 5-10 mins to create a new XM site from scratch.
  • How much it will take to deploy Sitecore XM Cloud?

    It may take less than 30 minutes for Sitecore Experience Manager to deploy a Sitecore instance, but it depends on the configurations and templates you use.

  • Is Sitecore XM cloud headless?

    Yes, It's a proper next-generation SaaS-based headless platform.

Thursday, 2 March 2023

Step by Step installation of Sitecore 10.3 on Azure PaaS

March 02, 2023 1


In this document we will learn how to setup Sitecore 10.3 XP on Azure PaaS. We shall briefly cover the step by step process and overview of Sitecore 10.3 XP setup.

While doing the installation, I follow Deploying a new Sitecore environment to the Microsoft Azure App service. Thanks, Sitecore Team!

Prerequisites:

To setup Sitecore 10.3 on Azure PaaS, we shall need the following:

 Deployment Topologies

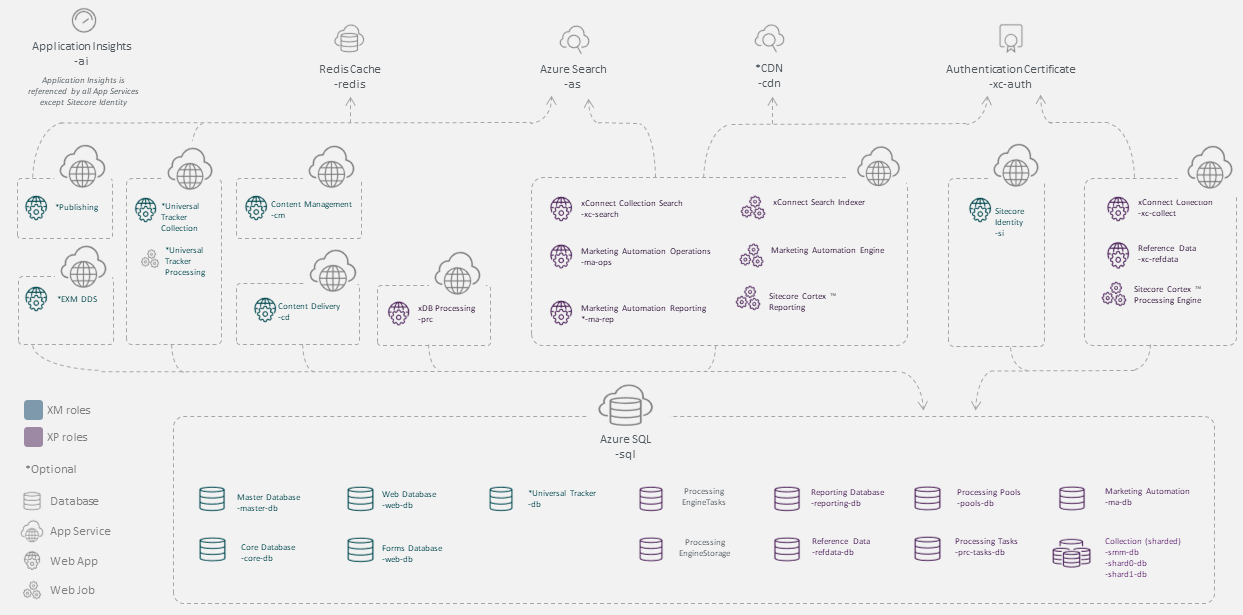
We will do the setup for Sitecore 10.3 XP. Sitecore XP product edition is the full Sitecore Experience Platform, which includes all Sitecore roles and services, including xConnect.

This is a Sitecore Experience Platform configuration that runs:

  • Three Sitecore roles: Content Delivery, Content Management, and Processing, as a single WebApp instance.
  • All XP roles: XConnect Search, XConnect Collection, xDB Reference Data, xDB Marketing Automation, xDB Marketing Automation Reporting, Sitecore Cortex™ ProcessingSitecore Cortex™ Reporting, Each role runs as a single WebApp instance.


Image Credit: Sitecore

Installation Step:

Step 1: Create a new folder E:\Sitecore1030

Step 2: Please copy License file in E:\license\license.xml

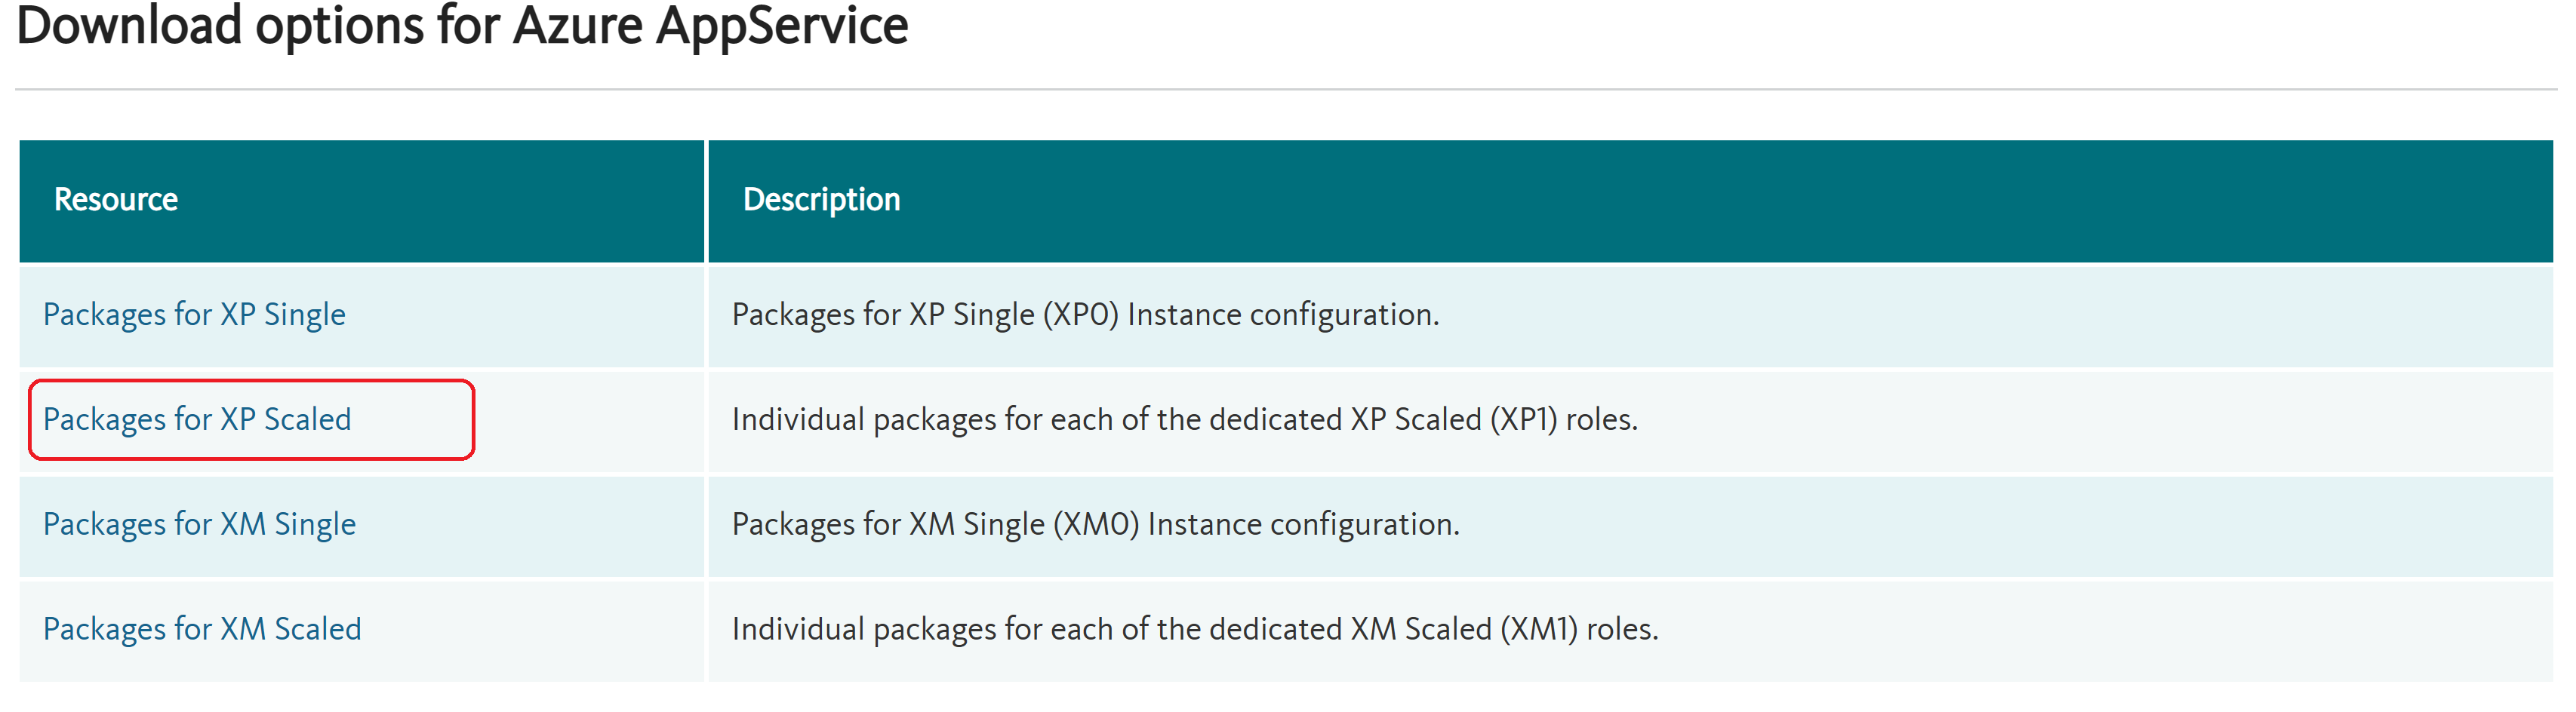
Step 3: Download options for Azure AppService for Sitecore 10.3 in Sitecore1030 folder. Please download XP Scaled.

Step 4: Download Sitecore.IdentityServer.7.0.325.scwdp in Sitecore1030 folder.

Step 5: Create Azure Storage AccountLogin to Azure portal and create a storage account. Ensure to select “Blob Storage”.

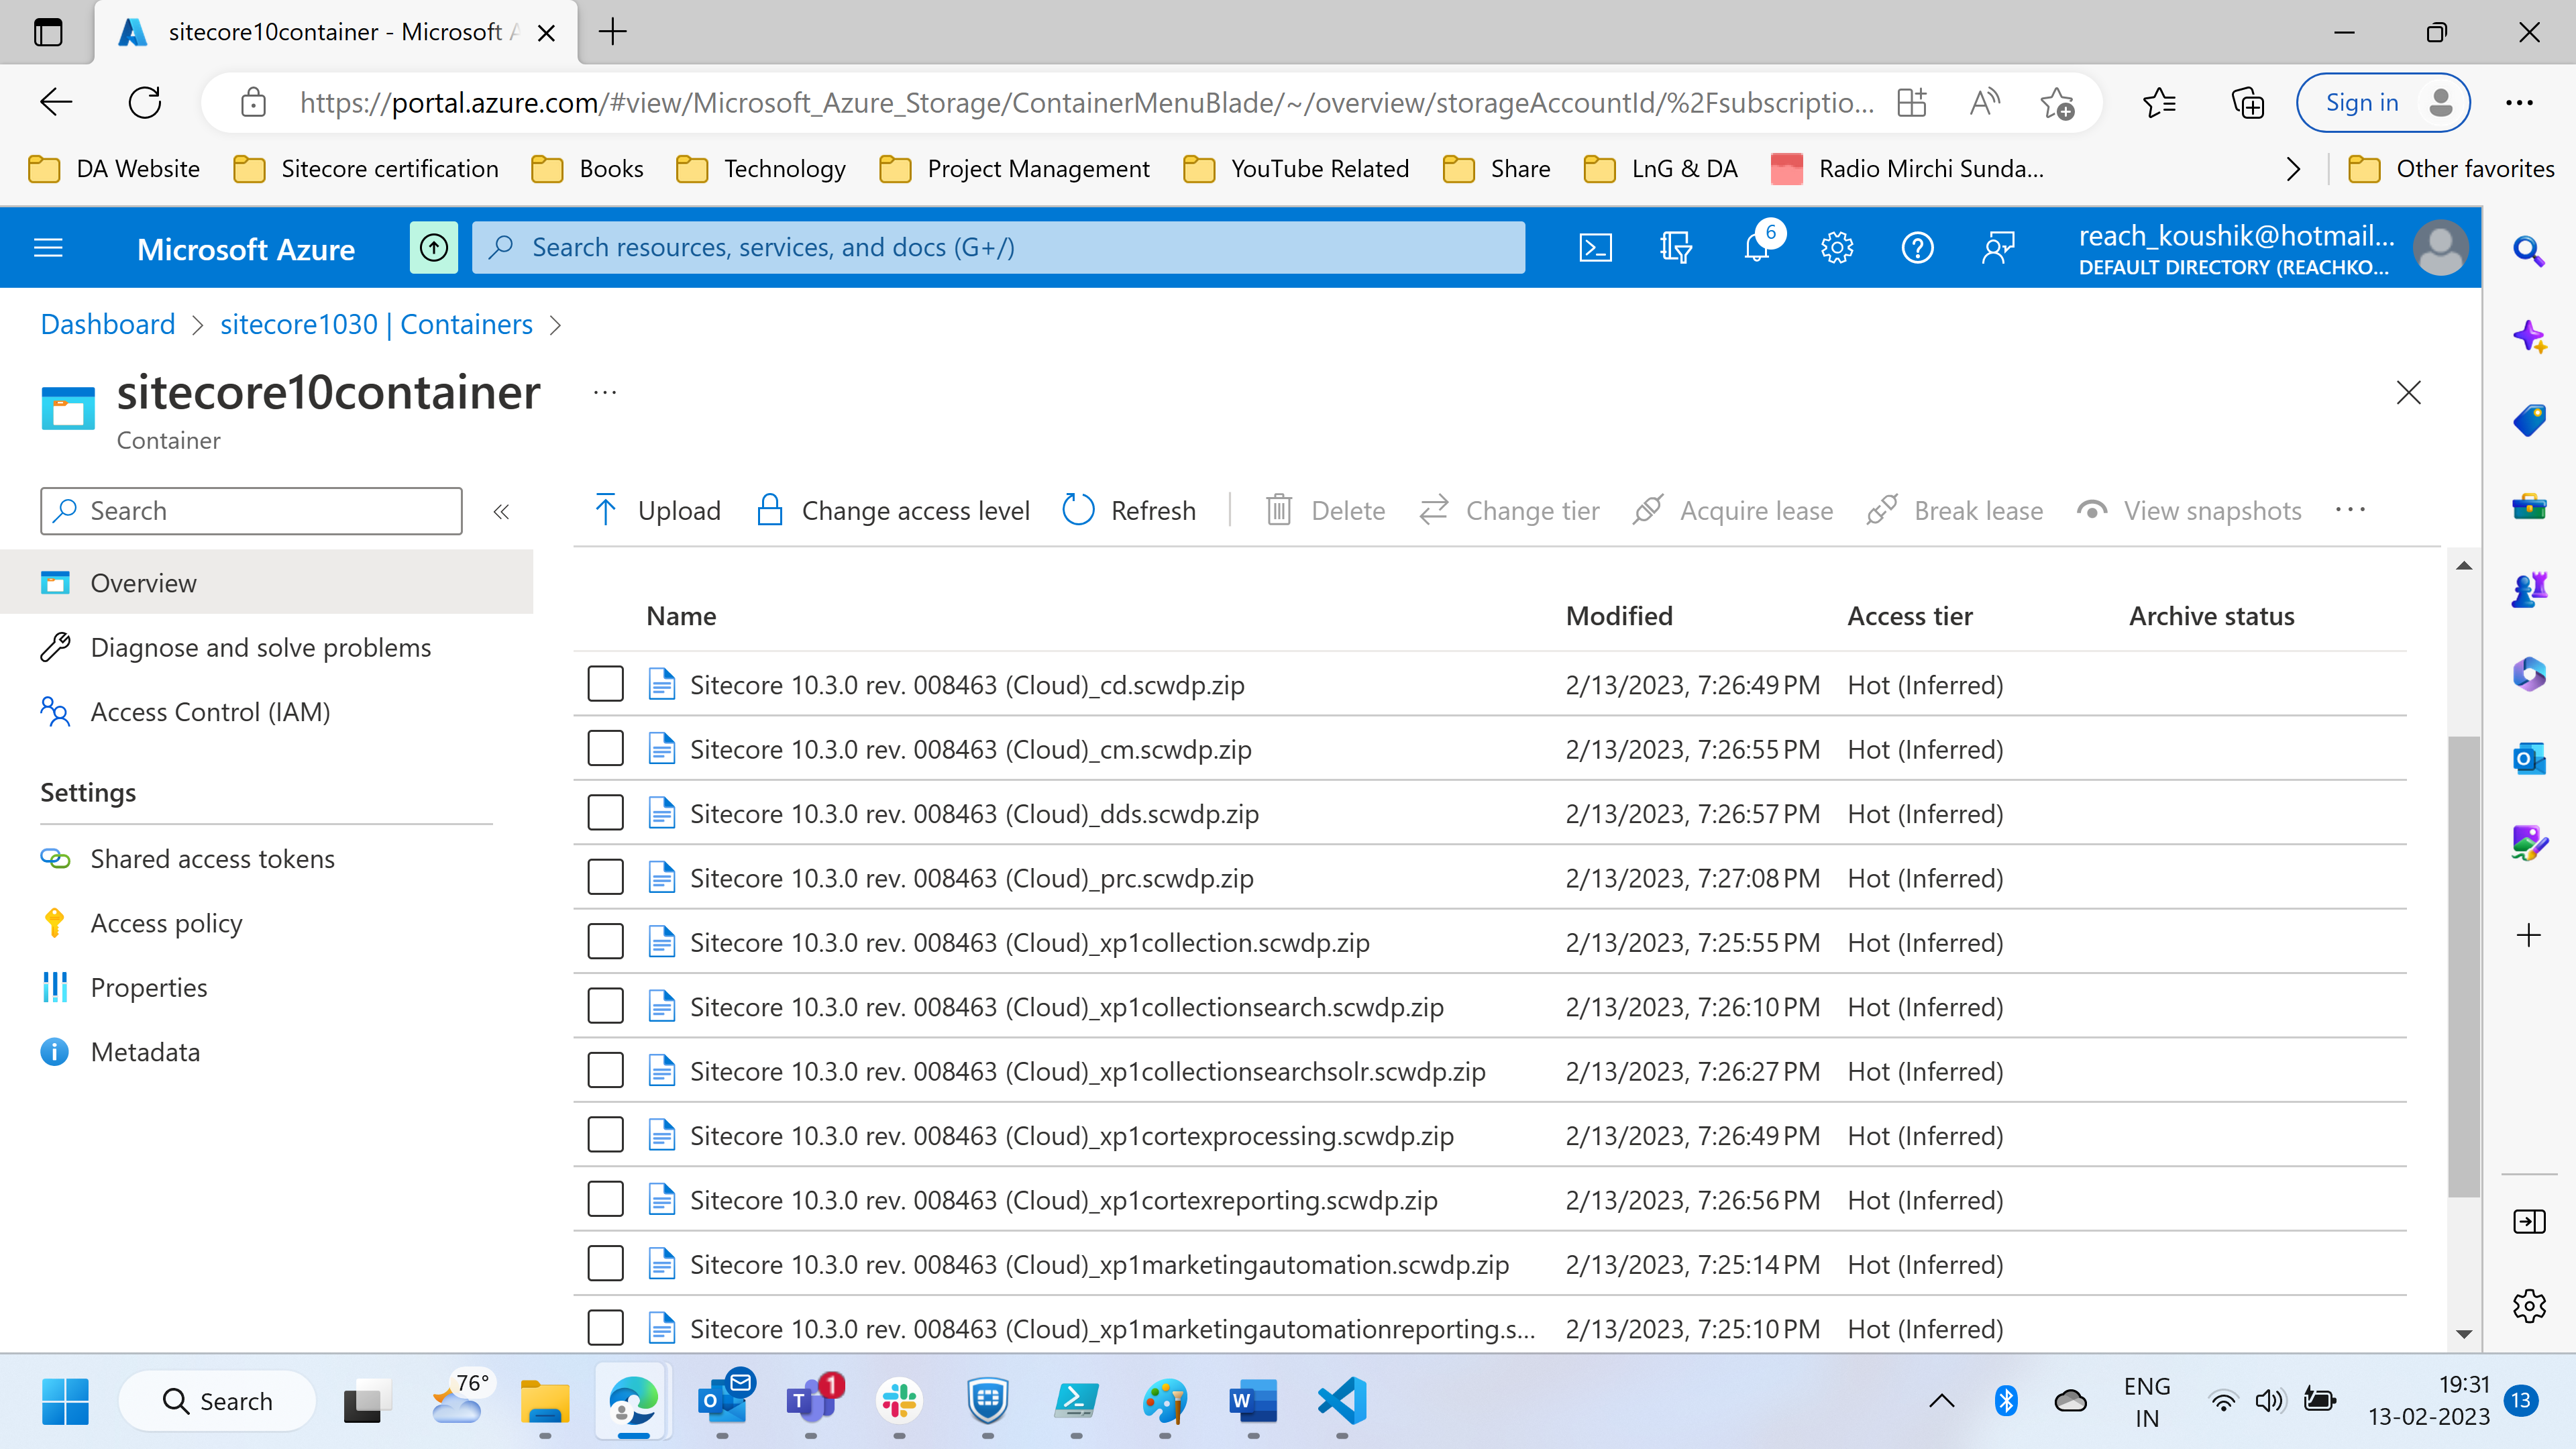
Step 6: Upload all of the WDP’s zips included in the chosen zip file that we downloaded.

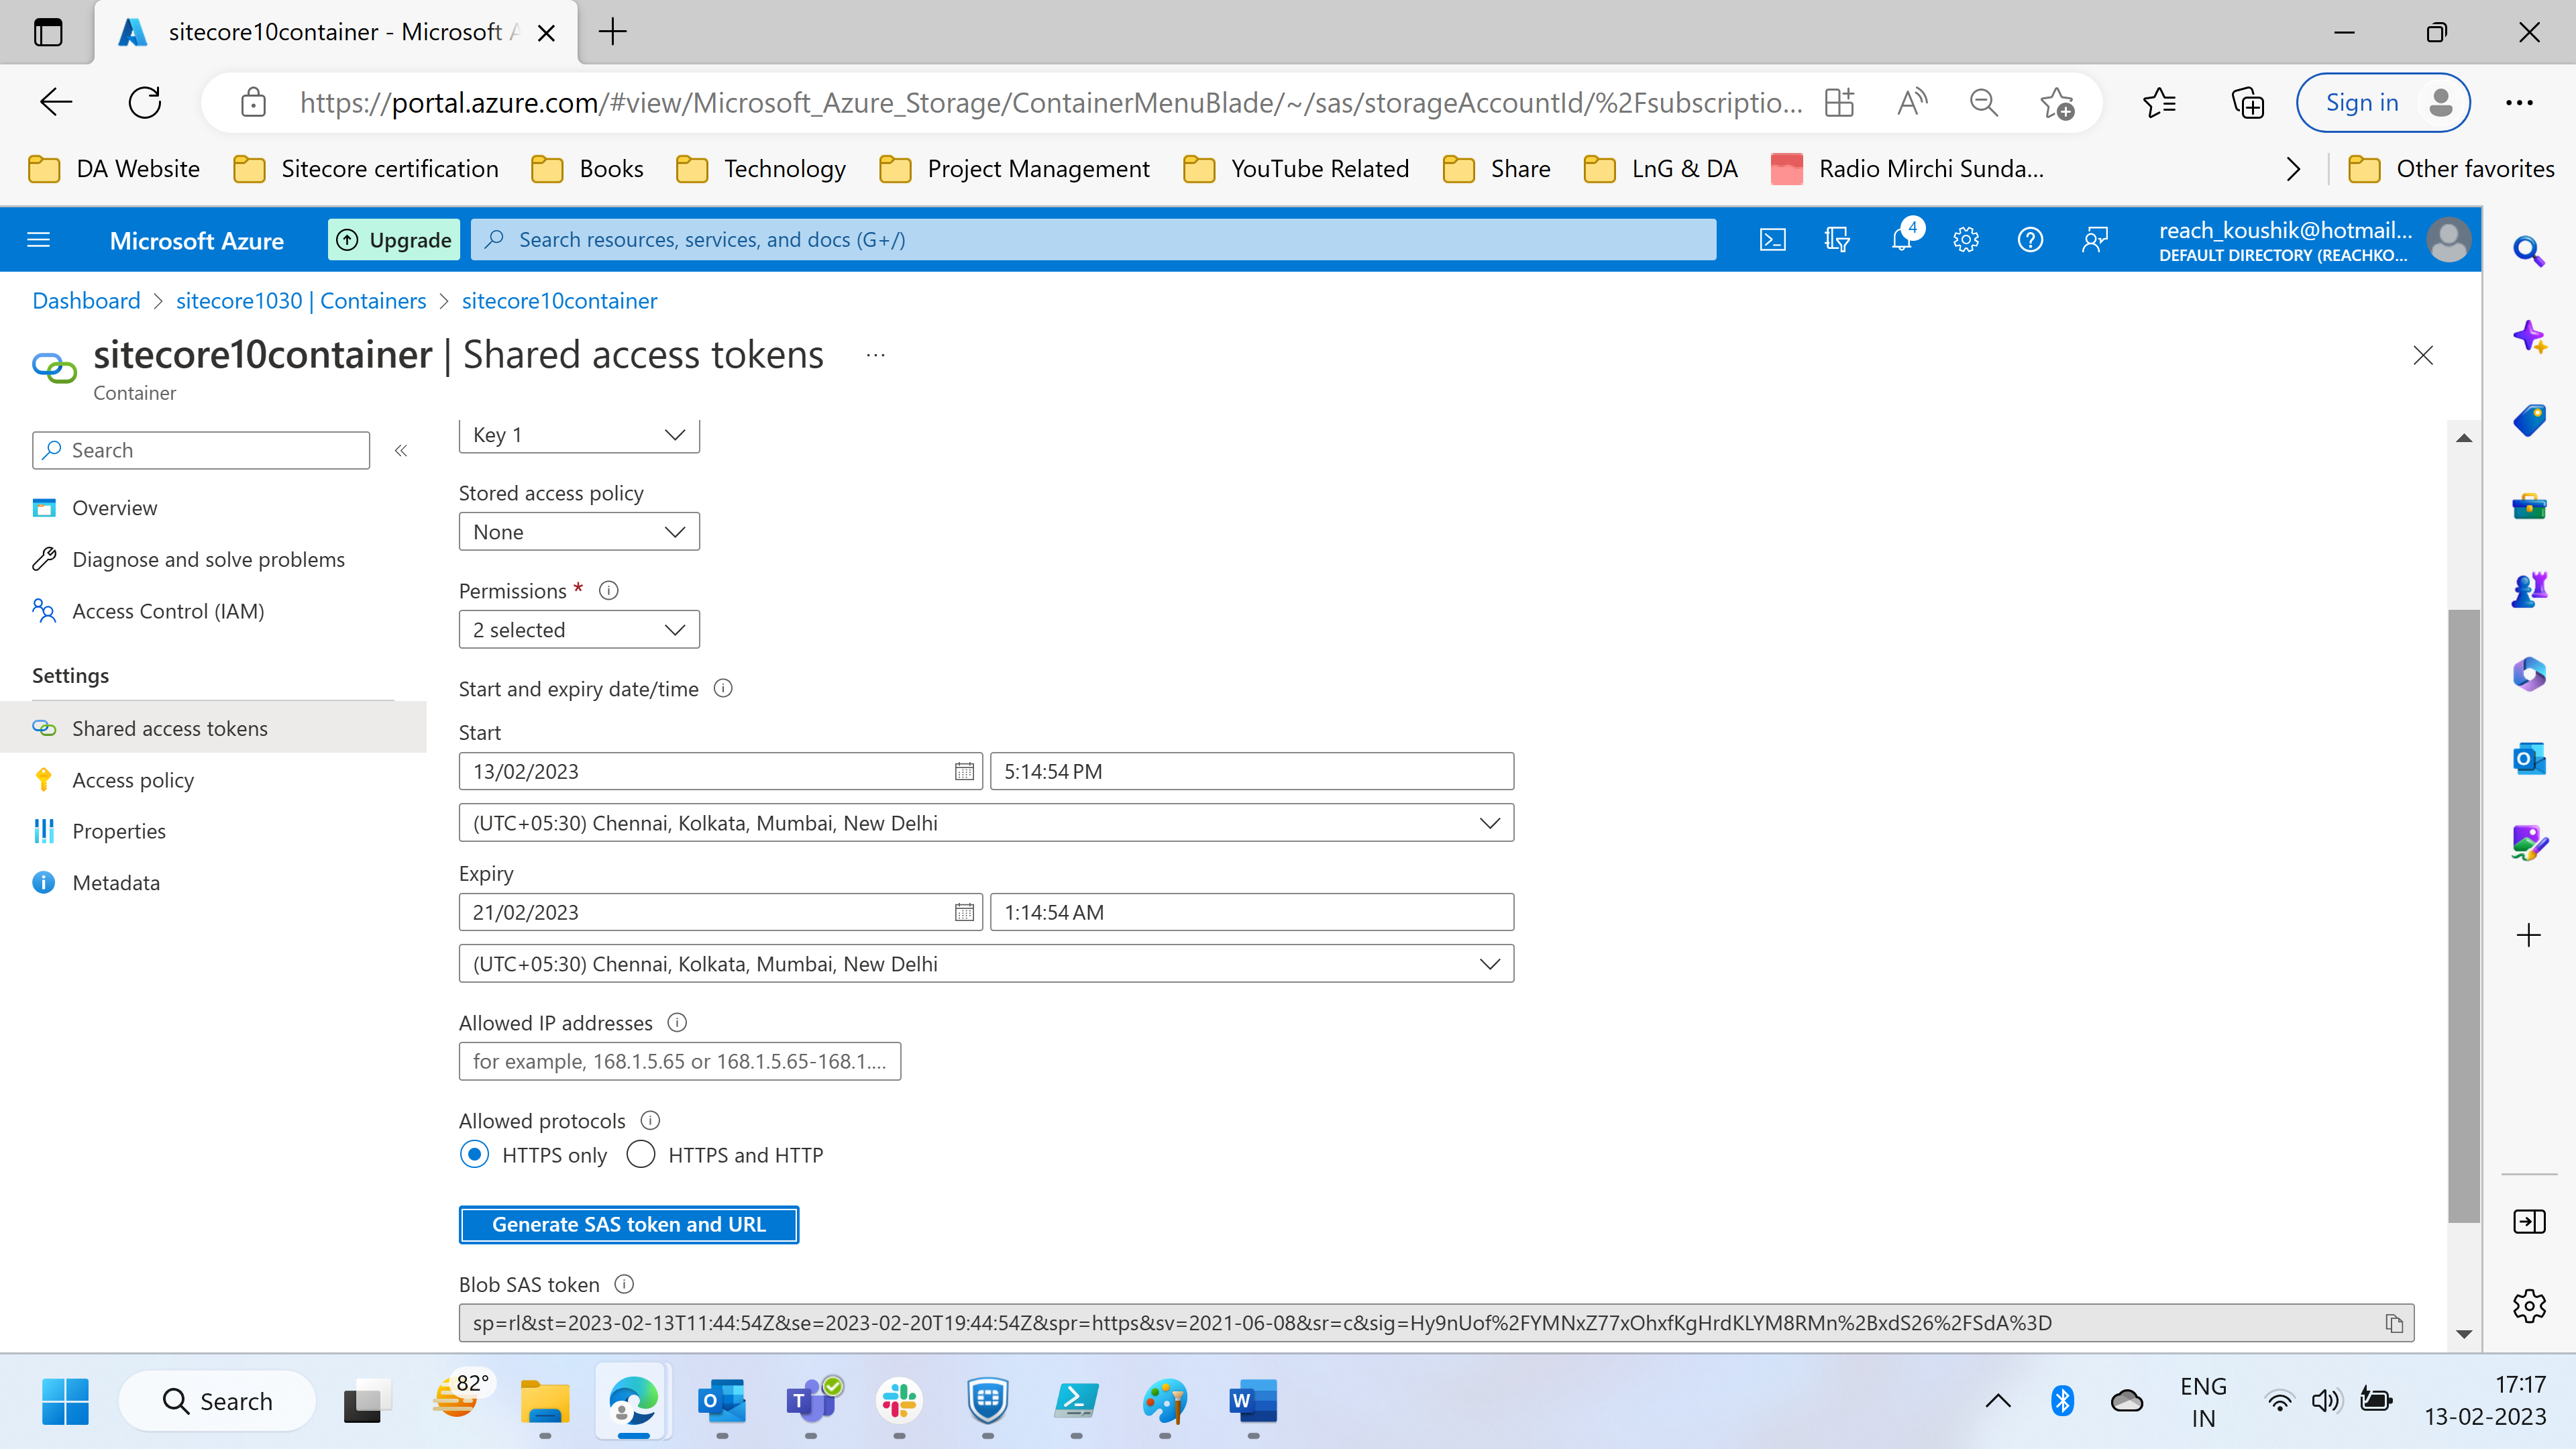
Step 7: Now, in Azure to access these files publicly, we must enable a Shared Access Signature. This can be achieved using Azure Storage Explorer. Please select the expire date as per your convenient. Also make sure to copy the token generated for Blob.

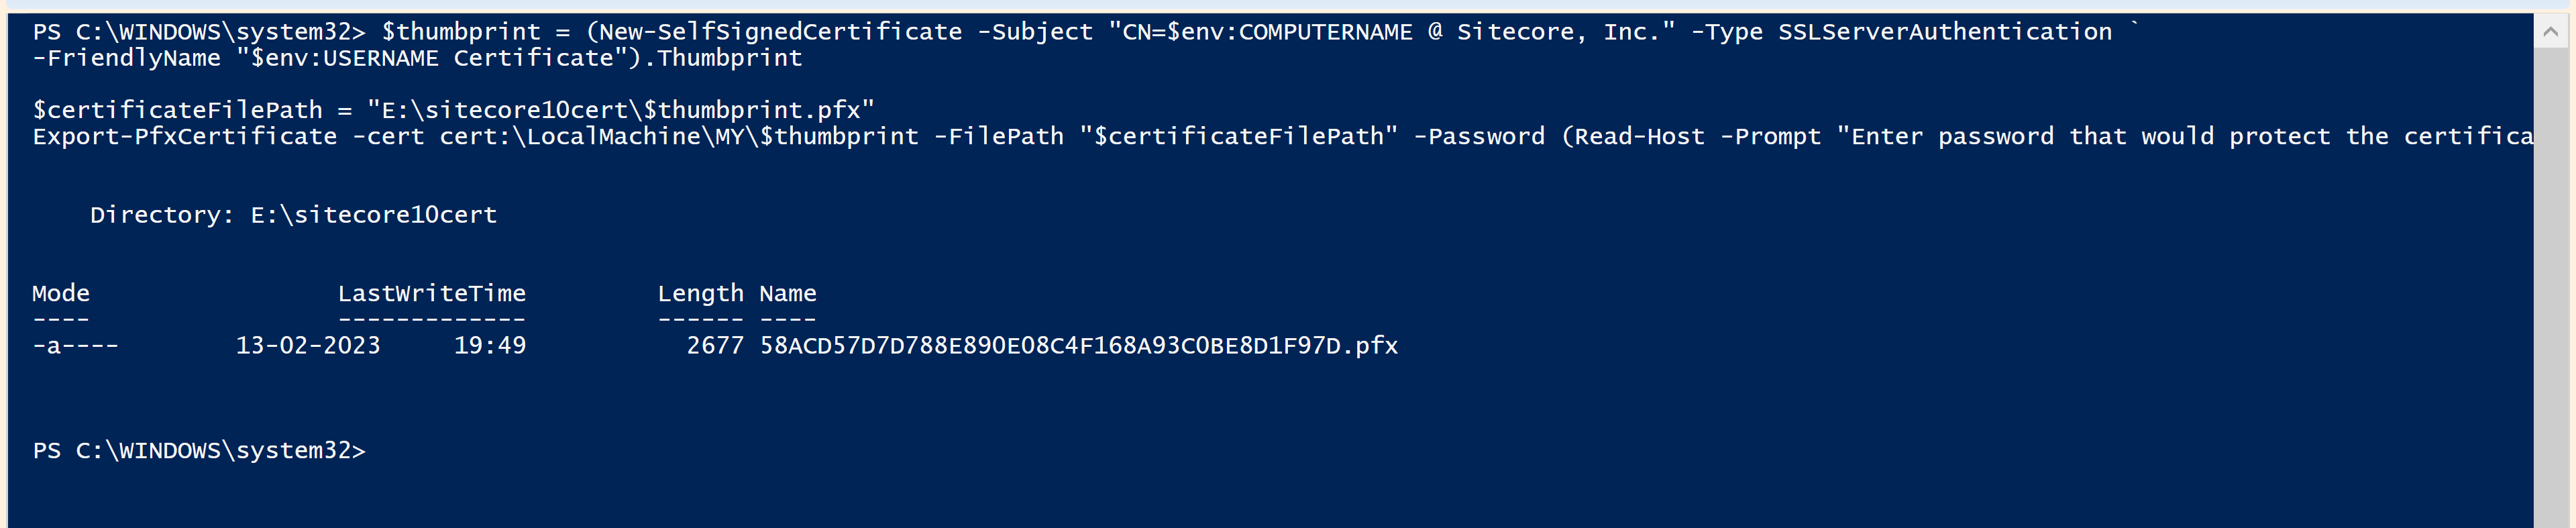
Step 8: Use PowerShell to create self-signed certificate in .pfx format, which we will use in setup configuration file. Please note the certificate password.

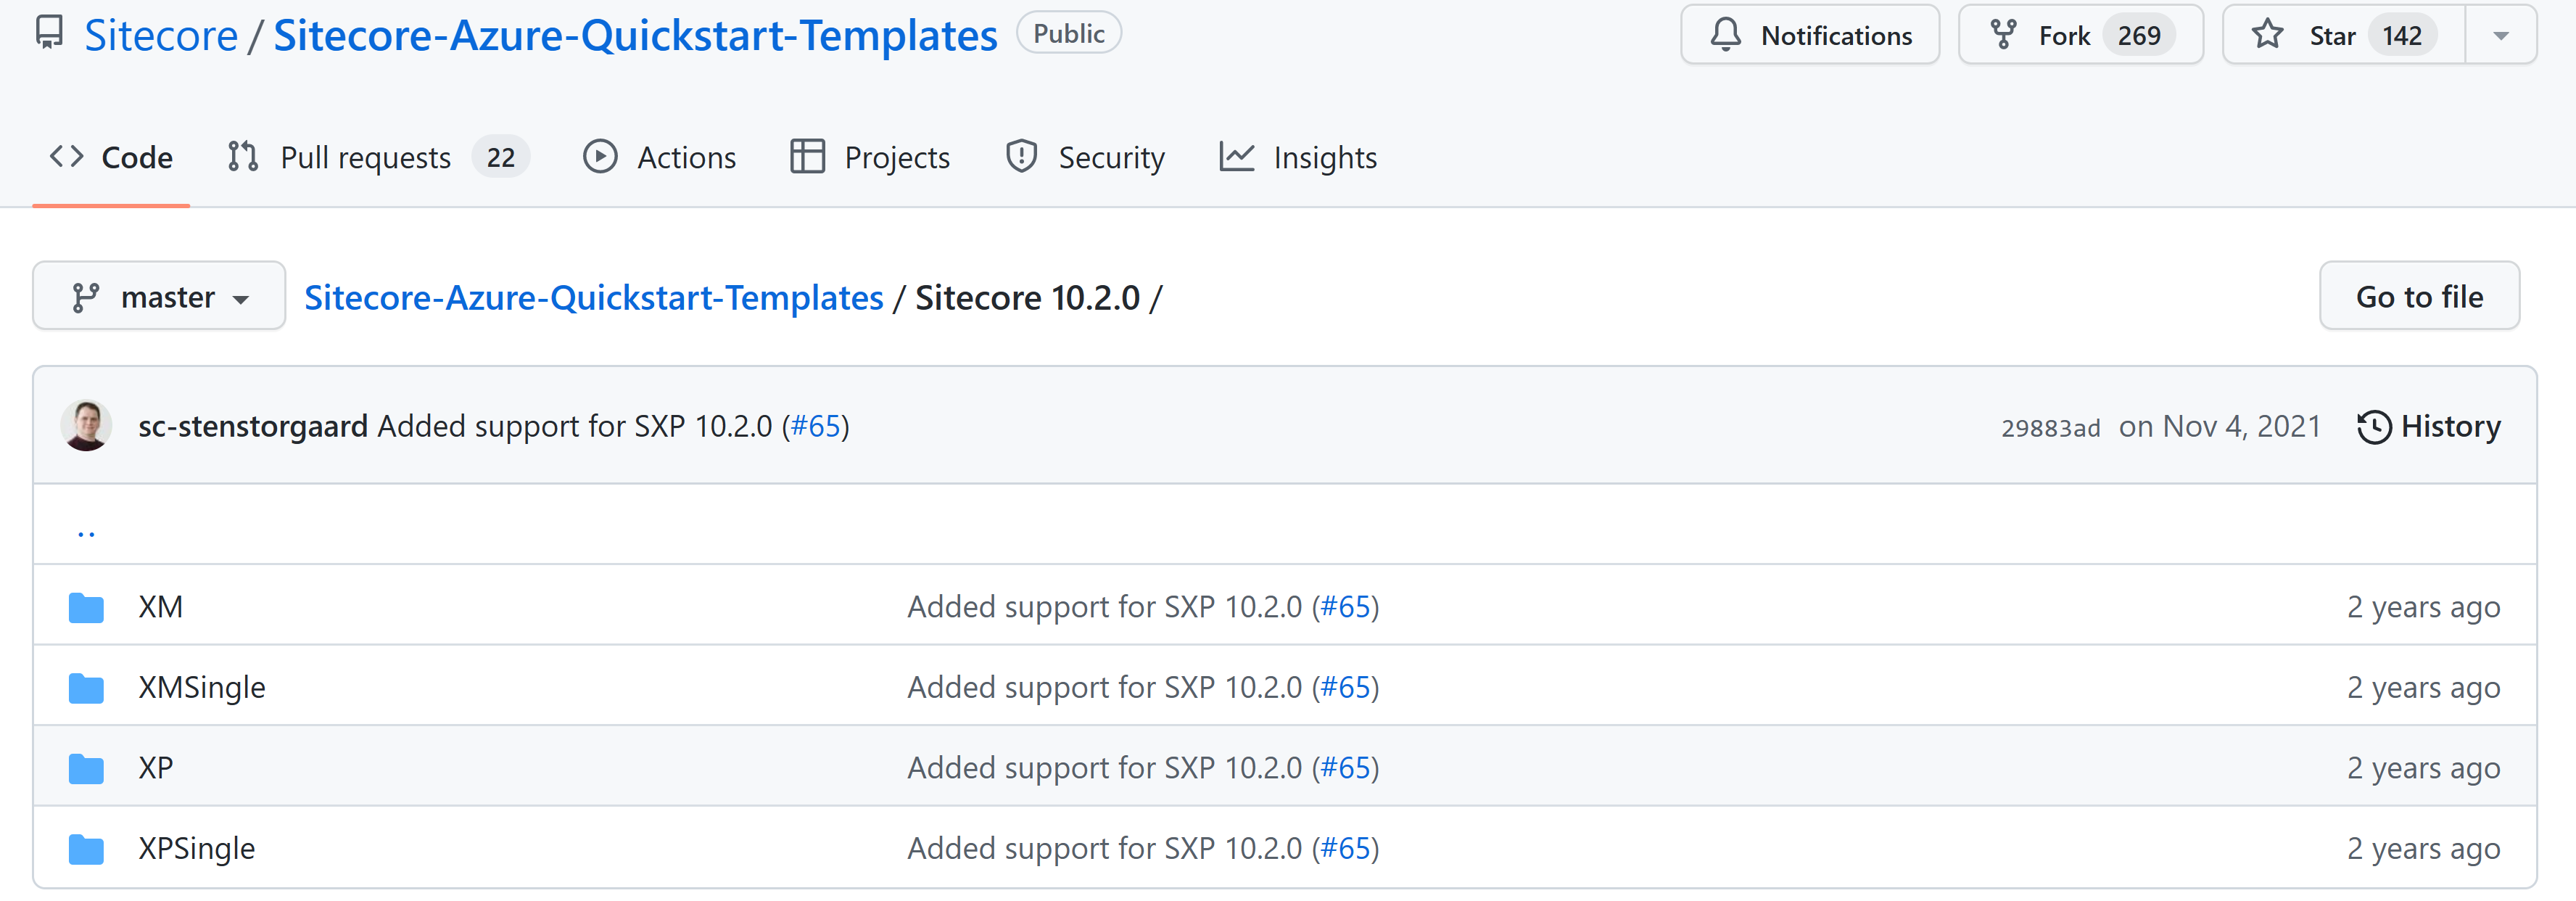
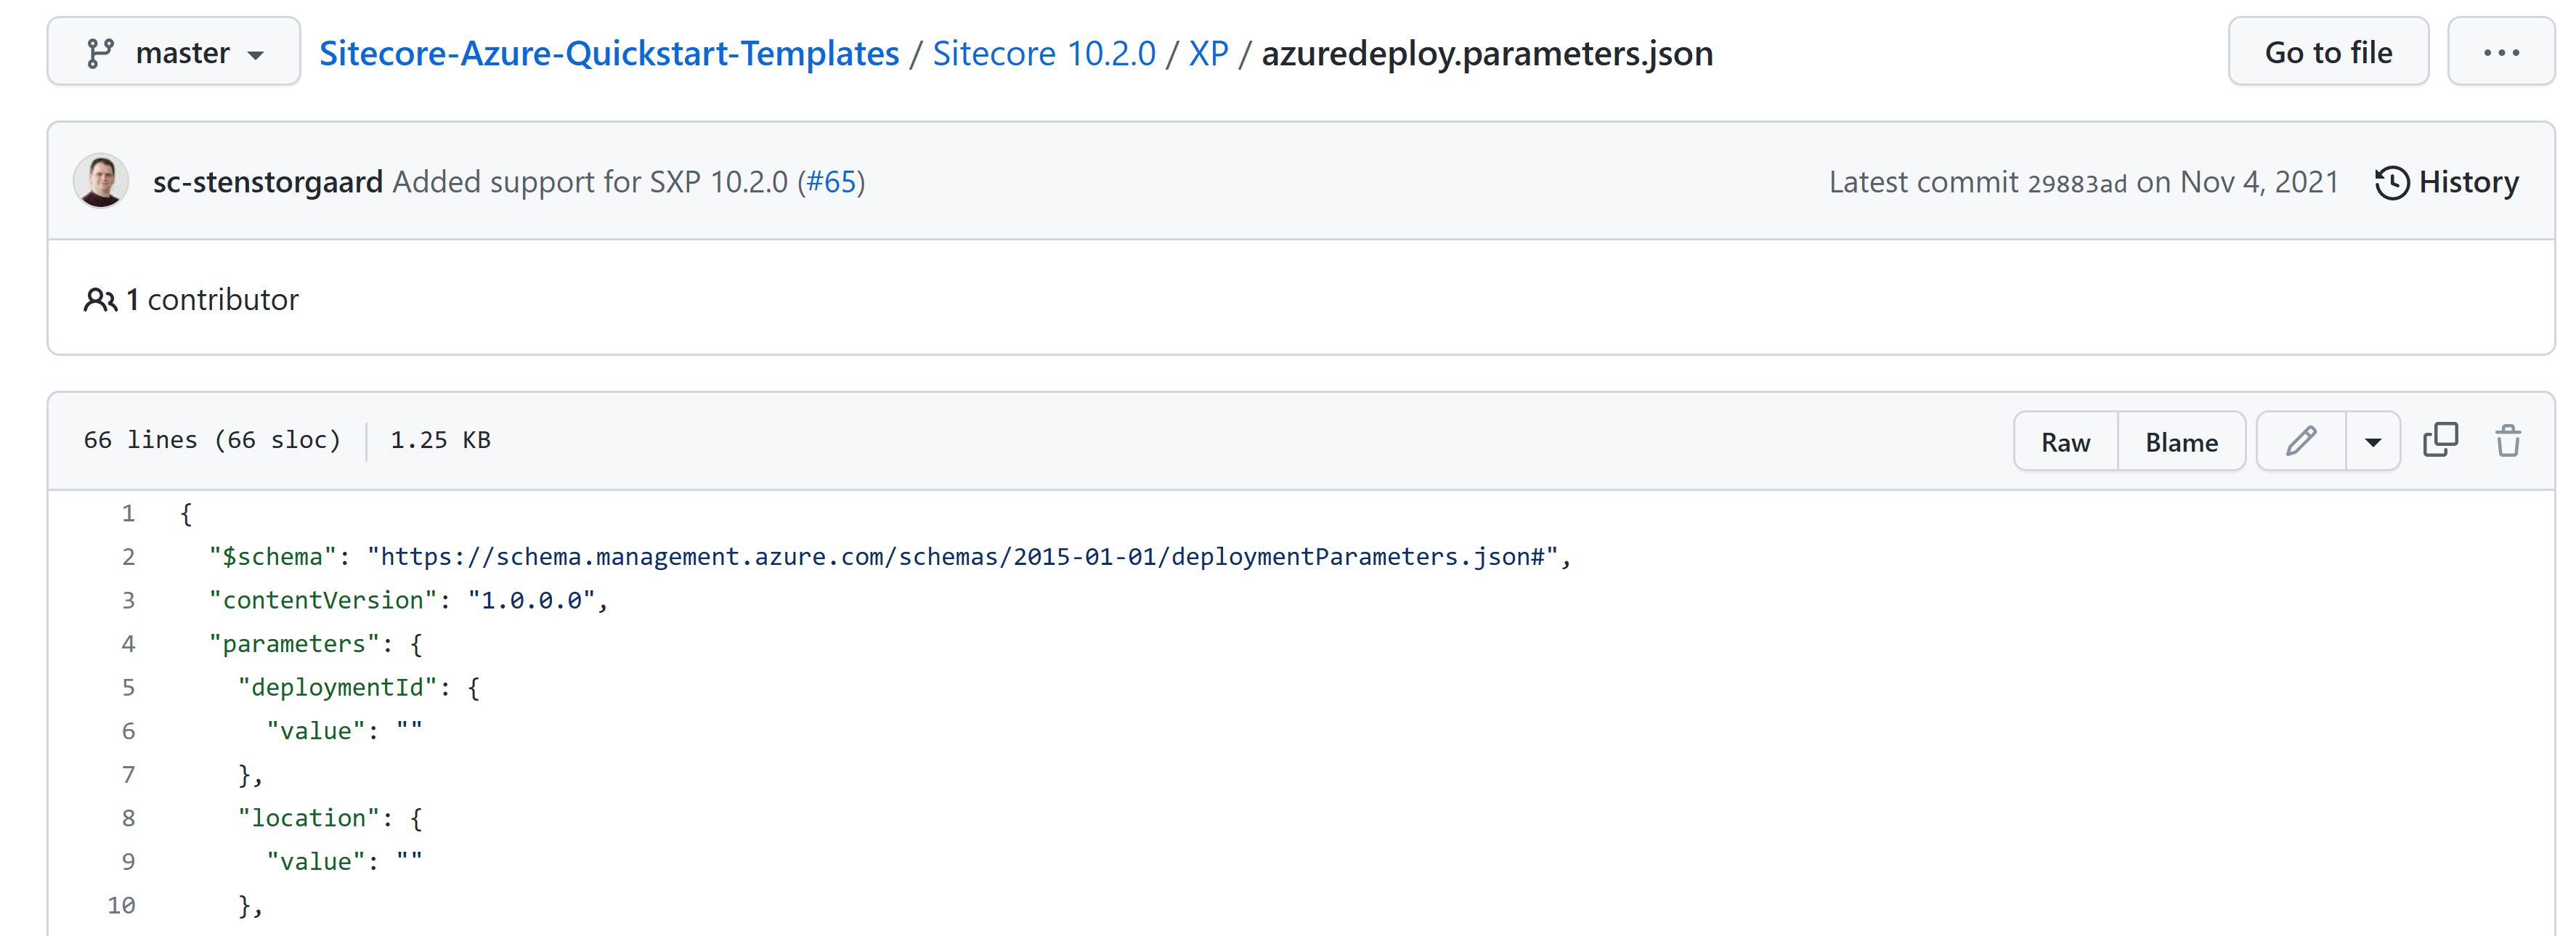
Step 9: Select and download Sitecore Azure Quick Strat template. This is important because the templates are what Azure will utilize to actually build out the resources based on the chosen topology. We can find the link to the GitHub to the Sitecore Azure ARM Templates on the Sitecore Azure Toolkit page. Here we need to select the proper Sitecore version to download the file. In our case we will download Sitecore 10.2.0 version, which is compatible for both 10.2 and 10.3.

I am going to choose XP-

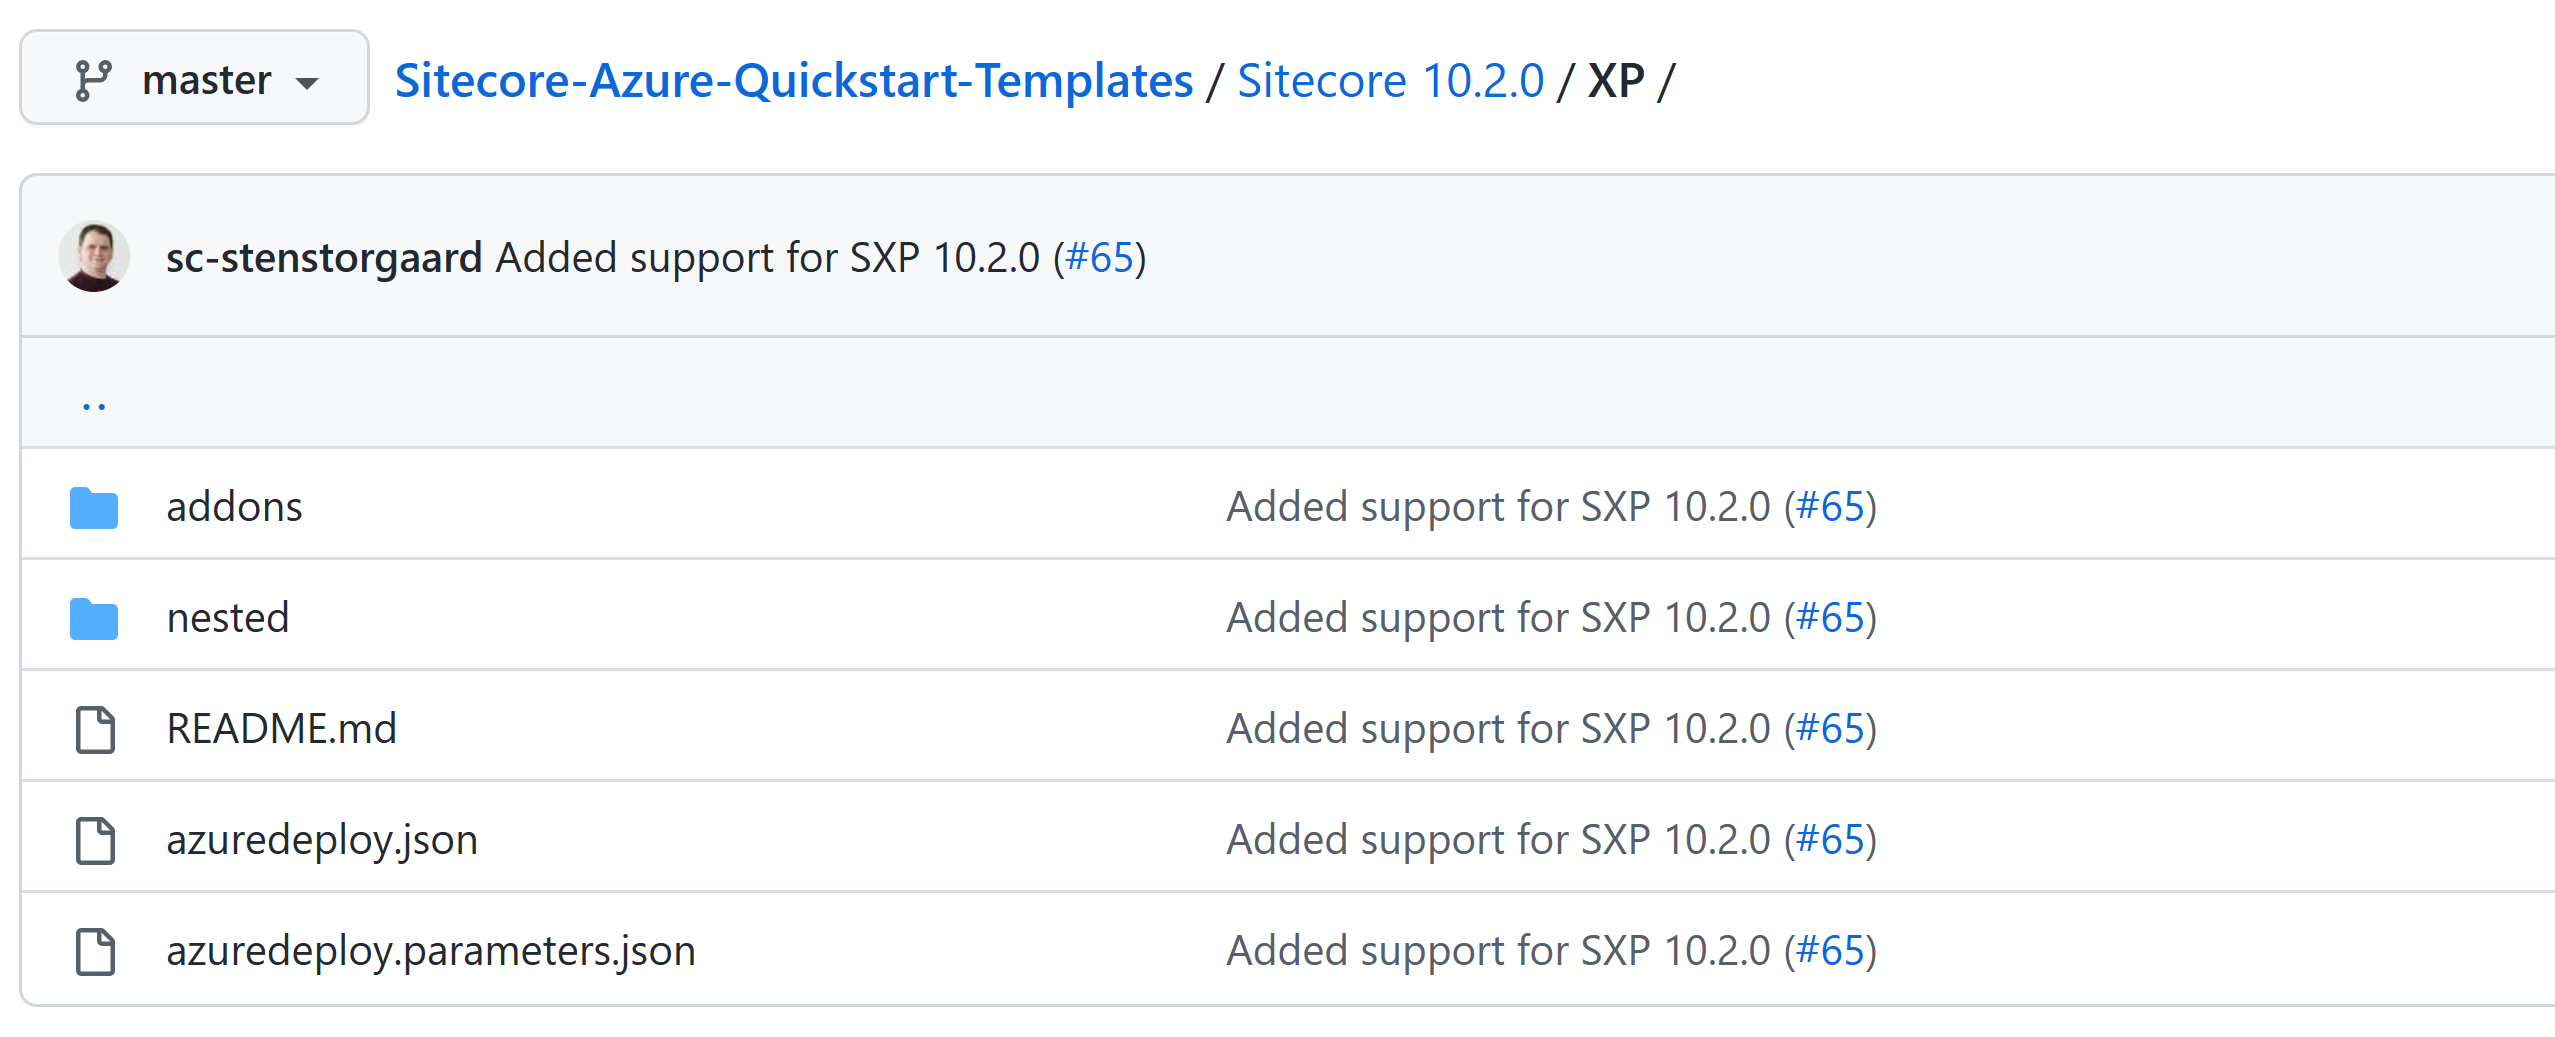
Find the azuredeploy.parameters.json file and click on it.

Now copy the URL without the trailing Slash and note it down. We will use it in configuration. For my case this is-
https://github.com/Sitecore/Sitecore-Azure-Quickstart-Templates/blob/master/Sitecore%2010.2.0/XP
Now that we have the raw file in your browser, I'll save that file into Now E:\Sitecore1030 directory as azuredeploy.parameters.json file. We will be configuring this file next.

Step 10: Now open the azuredeploy.parameters.json file using Visual Code and set the below parameter as instructed.
The deploymentId and licenseXml parameters in azuredeploy.parameters.json are filled in by the PowerShell script using Name and LicenseXmlPath parameters respectively.


Parameter Description
locationThe geographical region of the current deployment.
sqlServerLoginThe name of the administrator account for Azure SQL server that will be created.
sqlServerPasswordThe password for the administrator account for Azure SQL server.
sitecoreAdminPasswordThe new password for the Sitecore admin account.
repAuthenticationApiKeyA unique value (e.g. a GUID) that will be used as authentication key for communication between Content Management and the Processing Web App. Note: The minimal required length is 32 symbols
siMsDeployPackageUrlThe HTTP(s) URL to a Sitecore Identity Server Web Deploy package.
cmMsDeployPackageUrlThe HTTP(s) URL to a Sitecore XP Content Management Web Deploy package.
cdMsDeployPackageUrlThe HTTP(s) URL to a Sitecore XP Content Delivery Web Deploy package.
prcMsDeployPackageUrlThe HTTP(s) URL to a Sitecore XP Processing Web Deploy package.
xcRefDataMsDeployPackageUrlThe HTTP(s) URL to a XConnect Reference Data service Web Deploy package.
xcCollectMsDeployPackageUrlThe HTTP(s) URL to a XConnect Collection service Web Deploy package.
xcSearchMsDeployPackageUrlThe HTTP(s) URL to a XConnect Search service Web Deploy package.
maOpsMsDeployPackageUrlThe HTTP(s) URL to a Marketing Automation service Web Deploy package.
maRepMsDeployPackageUrlThe HTTP(s) URL to a Marketing Automation Reporting service Web Deploy package.
cortexProcessingMsDeployPackageUrlThe HTTP(s) URL to a Cortex Processing service Web Deploy package.
cortexReportingMsDeployPackageUrlThe HTTP(s) URL to a Cortex Reporting service Web Deploy package.
authCertificateBlobA Base64-encoded blob of the authentication certificate in PKCS #12 format.
authCertificatePasswordA password to the authentication certificate.


There are a series of Package URL parameters for mapping to the WDP’s that are in the Azure Storage Container. Each MsDeployPackageUrl maps to a role WDP.
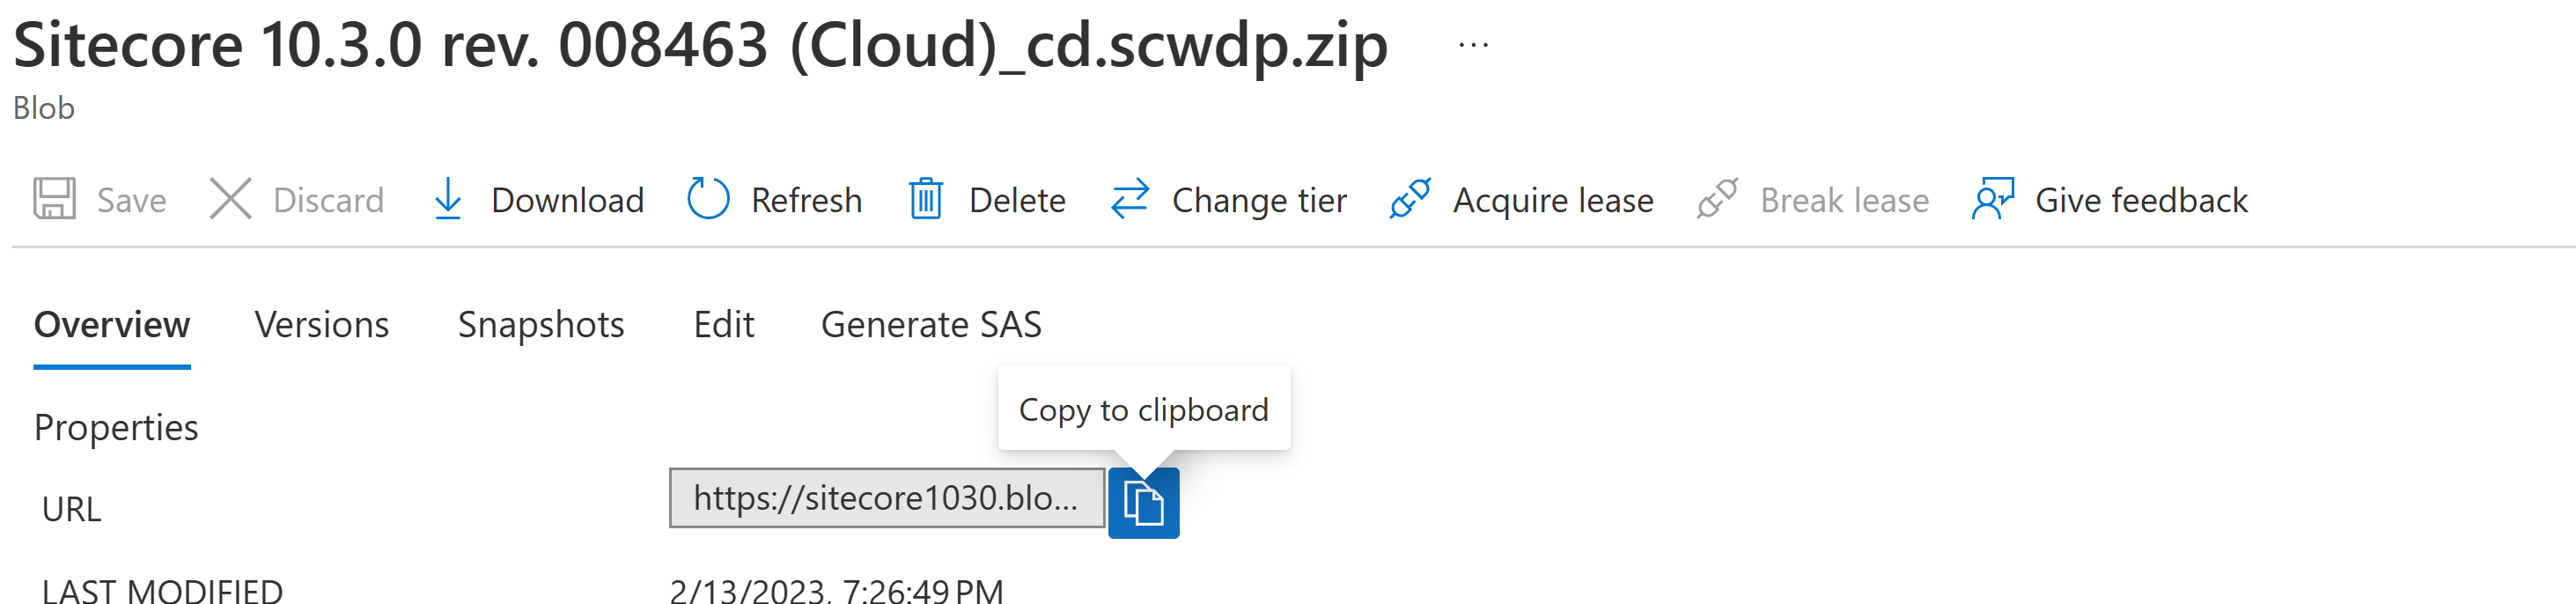
To obtain the full Uri, open up Azure Storage Explorer and navigate to the specific file, right click on it, and choose Properties.

Next, after we have pasted the Uri for the specific file into the parameters, paste the Token in the Query String of the Uri, that we saved from step 7

Step 11: In the event we’re using a self-signed certificate, so need to add allowInvalidClientCertificate parameter to your parameter JSON

file."allowInvalidClientCertificates": {
"value": true
}
,

Step 12:  The following script can be utilized directly by copy/pasting and changing the values to suit your need. I named this script DeploySitecore1030.ps1 but you can call it whatever you like.

$SCSDK="E:\Sitecore1030\ToolKit\Sitecore Azure Toolkit 2.8.0-r02542.1366\tools"
$SCTemplates=https://raw.githubusercontent.com/Sitecore/Sitecore-Azure-Quickstart-Templates/master/Sitecore%2010.2.0/XP
$DeploymentId = "sitecore1030"
$ResourceGroup = "sitecore1030"
$LicenseFile = "E:\license\license.xml"
$CertificateFile = "E:\sitecore10cert\58ACD57D7D788E890E08C4F168A93C0BE8D1F97D.pfx"
$SubscriptionId = "5777ffac-35e1-4e61-803d-2a259813e503"
$Location="East US"
$ParamFile="E:\Sitecore1030\azuredeploy.parameters.json"
$Parameters = @{"deploymentId"=$DeploymentId;"authCertificateBlob" = [System.Convert]::ToBase64String([System.IO.File]::ReadAllBytes($CertificateFile))}
Import-Module $SCSDK\Sitecore.Cloud.Cmdlets.psm1
Add-AzAccount
Connect-AzAccount -SubscriptionId $SubscriptionId
Start-SitecoreAzureDeployment -Name $ResourceGroup -Location $Location -ArmTemplateUrl "$SCTemplates/azuredeploy.json" -ArmParametersPath $ParamFile -LicenseXmlPath $LicenseFile -SetKeyValue $Parameters -Verbose

$SCSDK – Point this to the tools directory that was added by the Sitecore Azure Toolkit.
$SCTemplates – Point this to the ARM Template URL saved in point 9
$DeploymentId – Can be anything up to 60 characters. I used same as Azure Resource group name.
$ResourceGroup – The name of the Azure Resource Group to install the services in.
$LicenseFile – the location of your license.xml.
$CertificateFile – the location of your client certificate.
$Location – Azure Geographical Location.
$ParamFile – the location of your azuredeploy.parameters.json file.

Step 13: After all the steps previously are complete, now it's time to Run our PowerShell script!
Open PowerShell as Administrator and change directory to E:\Sitecore1030 (Where we have the PS1 file) and run the PS1 file.

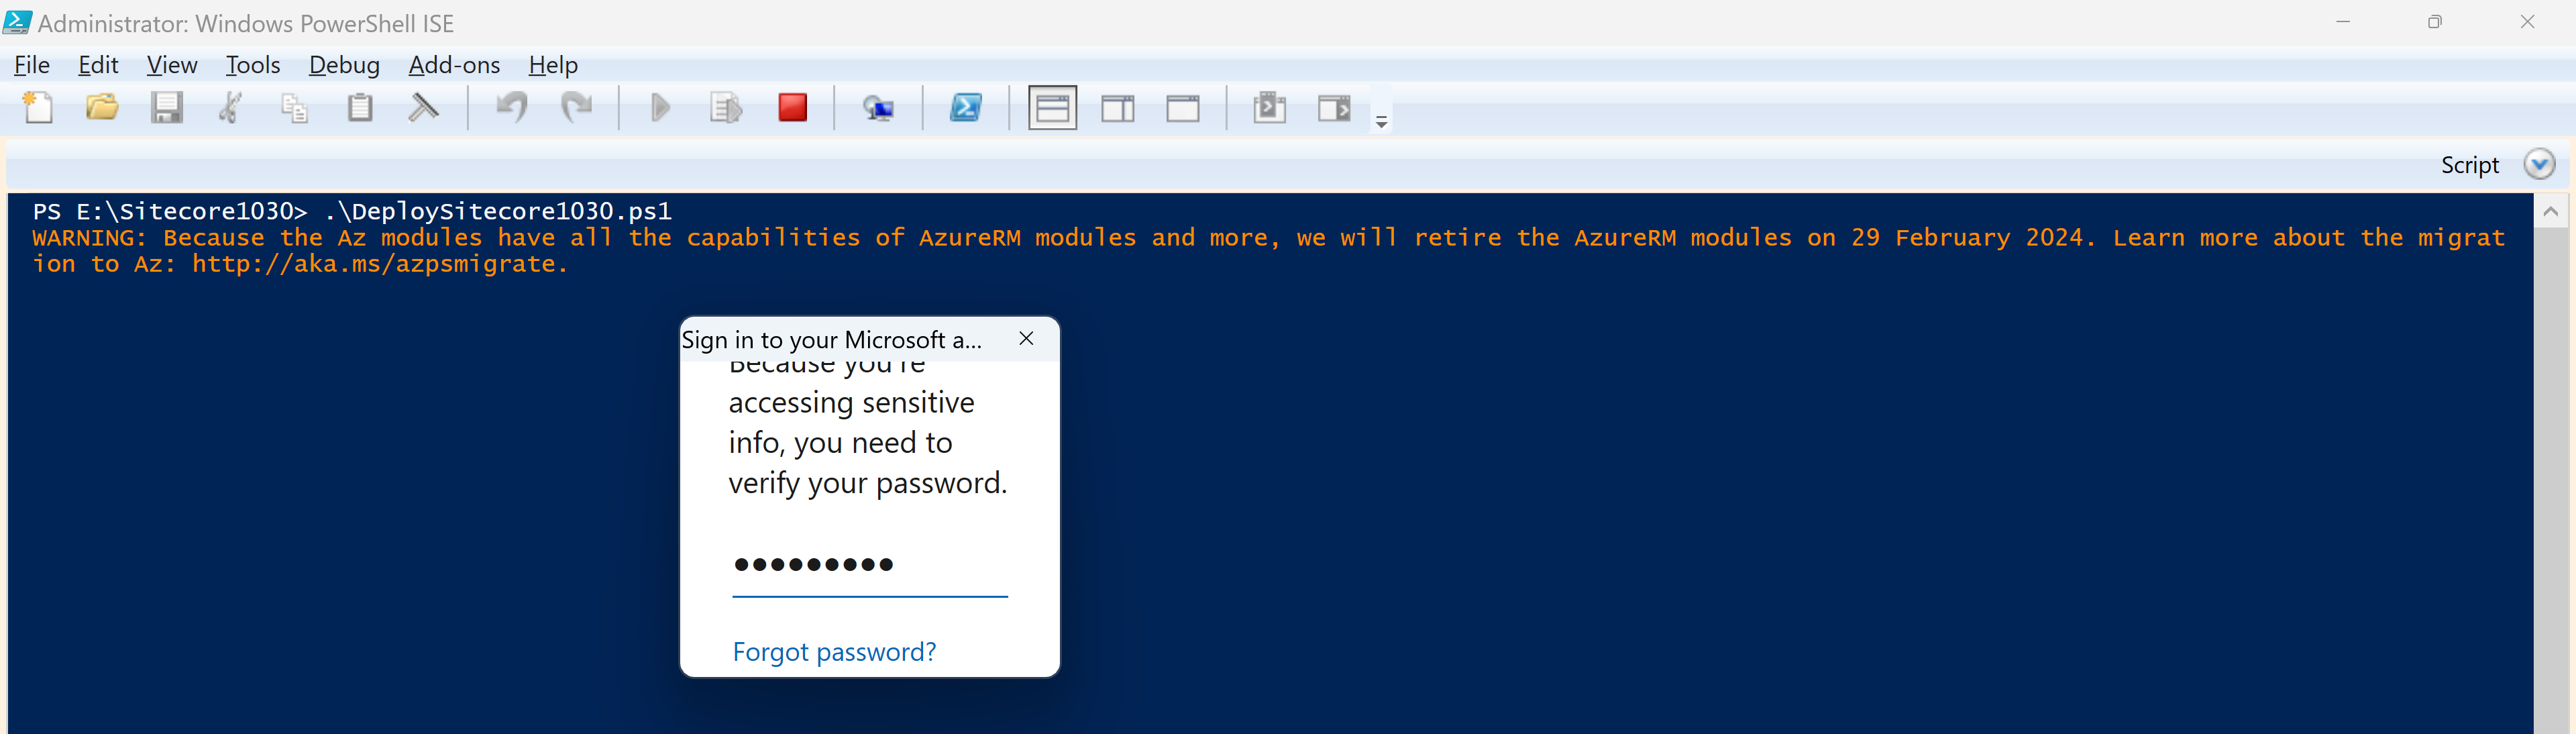
Step 14: This will prompt Azure portal credential. Please provide proper credential.

Azure Credential

Step 15: Deployment Status
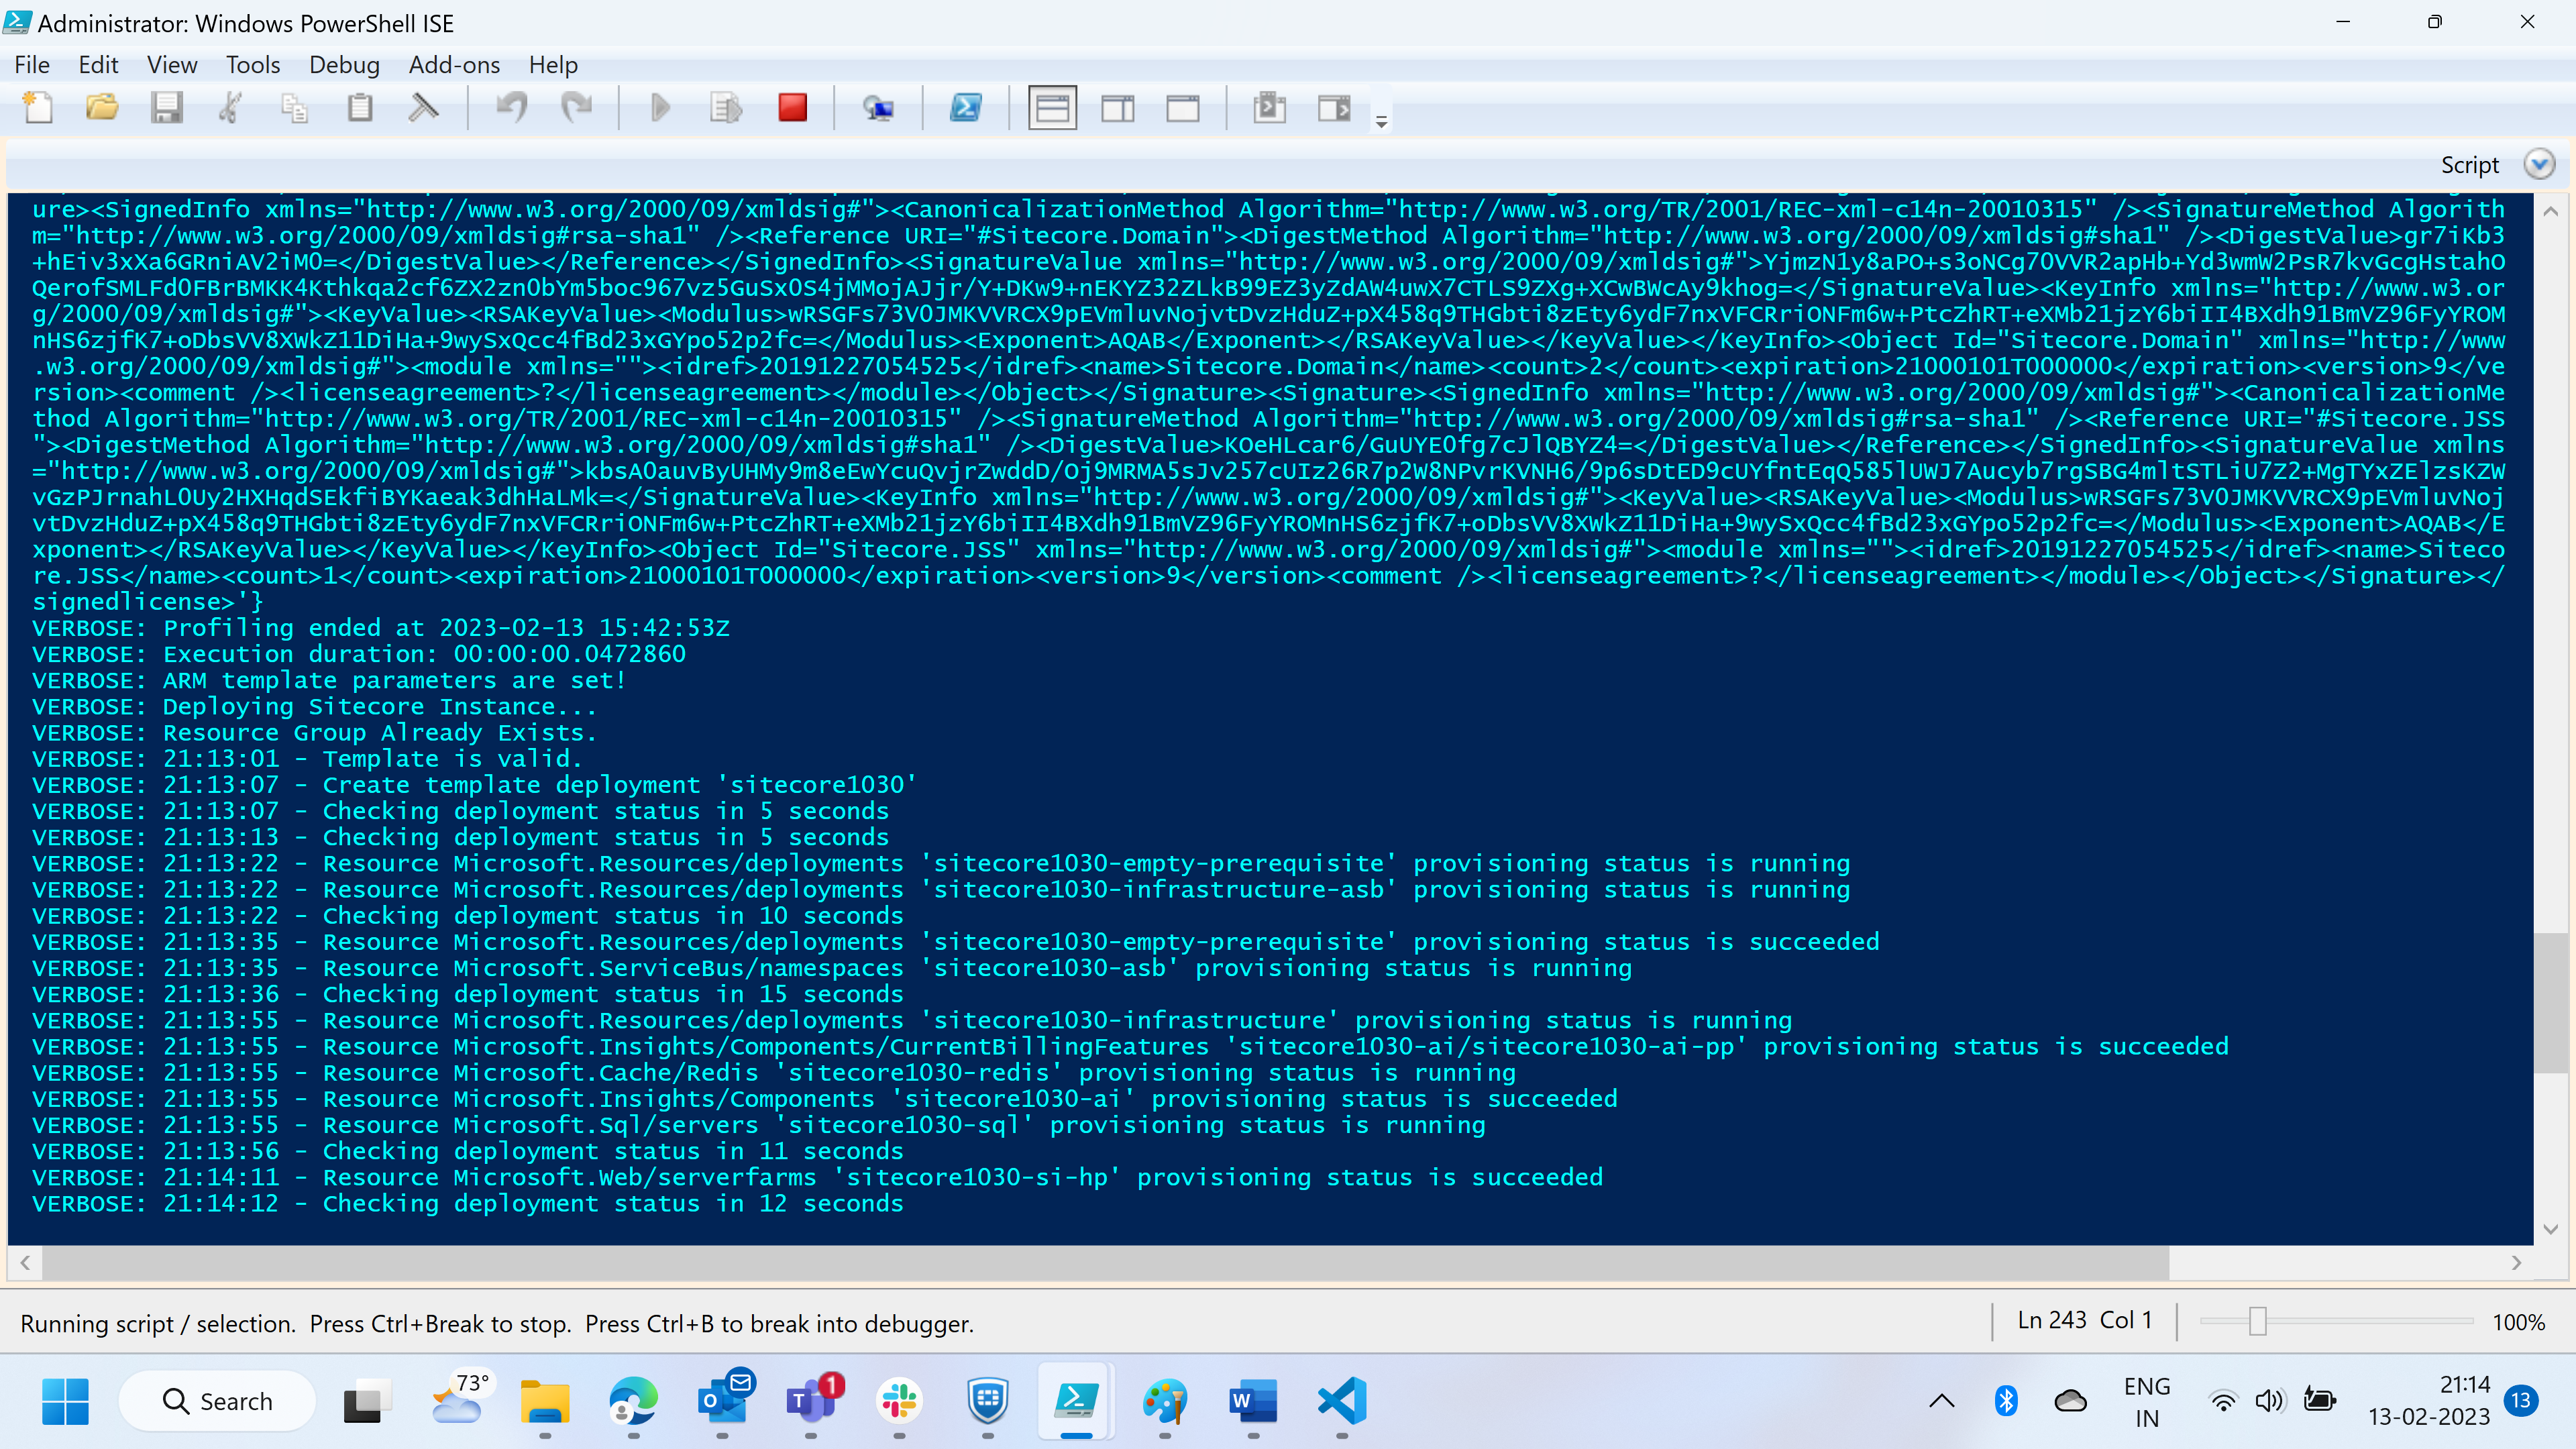
It will take 20-30 minutes to complete the deployment depending on the bandwidth. We can view the deployment status from PowerShell-

Azure Deployment

We can also observe the deployment progress in the Azure Portal, by clicking on the Resource Group and choosing Deployments.

Post-Deployment Steps

Once the deployment is complete, there are a few steps that we should follow.

  • Rebuild All Indexes from Control Panel
  • Rebuild the Link Databases from Control Panel
  • From Control Panel, Deploy all Marketing Data

Conclusion

In closing, Sitecore has become a very complex and highly scalable platform. The possibilities are endless with Sitecore on Azure. Azure PaaS provides less expensive deployment solution and easy to manage most of the standard deployment instances. And Sitecore is also recommending this.

FAQ

Which search engines available?

Azure PaaS provide Azure Search engine to be used for your Sitecore implementation. We can use Solr search on with custom integration.
Sitecore Solr PaaS deployment requires the following parameters to be specified in azuredeploy.parameters.json:
solrConnectionString- Connection string to existing Solr server that will be passed to Sitecore Platform Roles.
xcSolrConnectionString- Not mandatory. Connection string to existing Solr server that will be passed to XConnect Roles. If the parameter is not specified, the default value equals to solrConnectionString.
xcSearchMsDeployPackageUrl - The HTTP(s) URL to a Solr XConnect Search Web Deploy package.

What all Sitecore modules Azure PaaS supports?
You can review this article. https://kb.sitecore.net/articles/201557 .

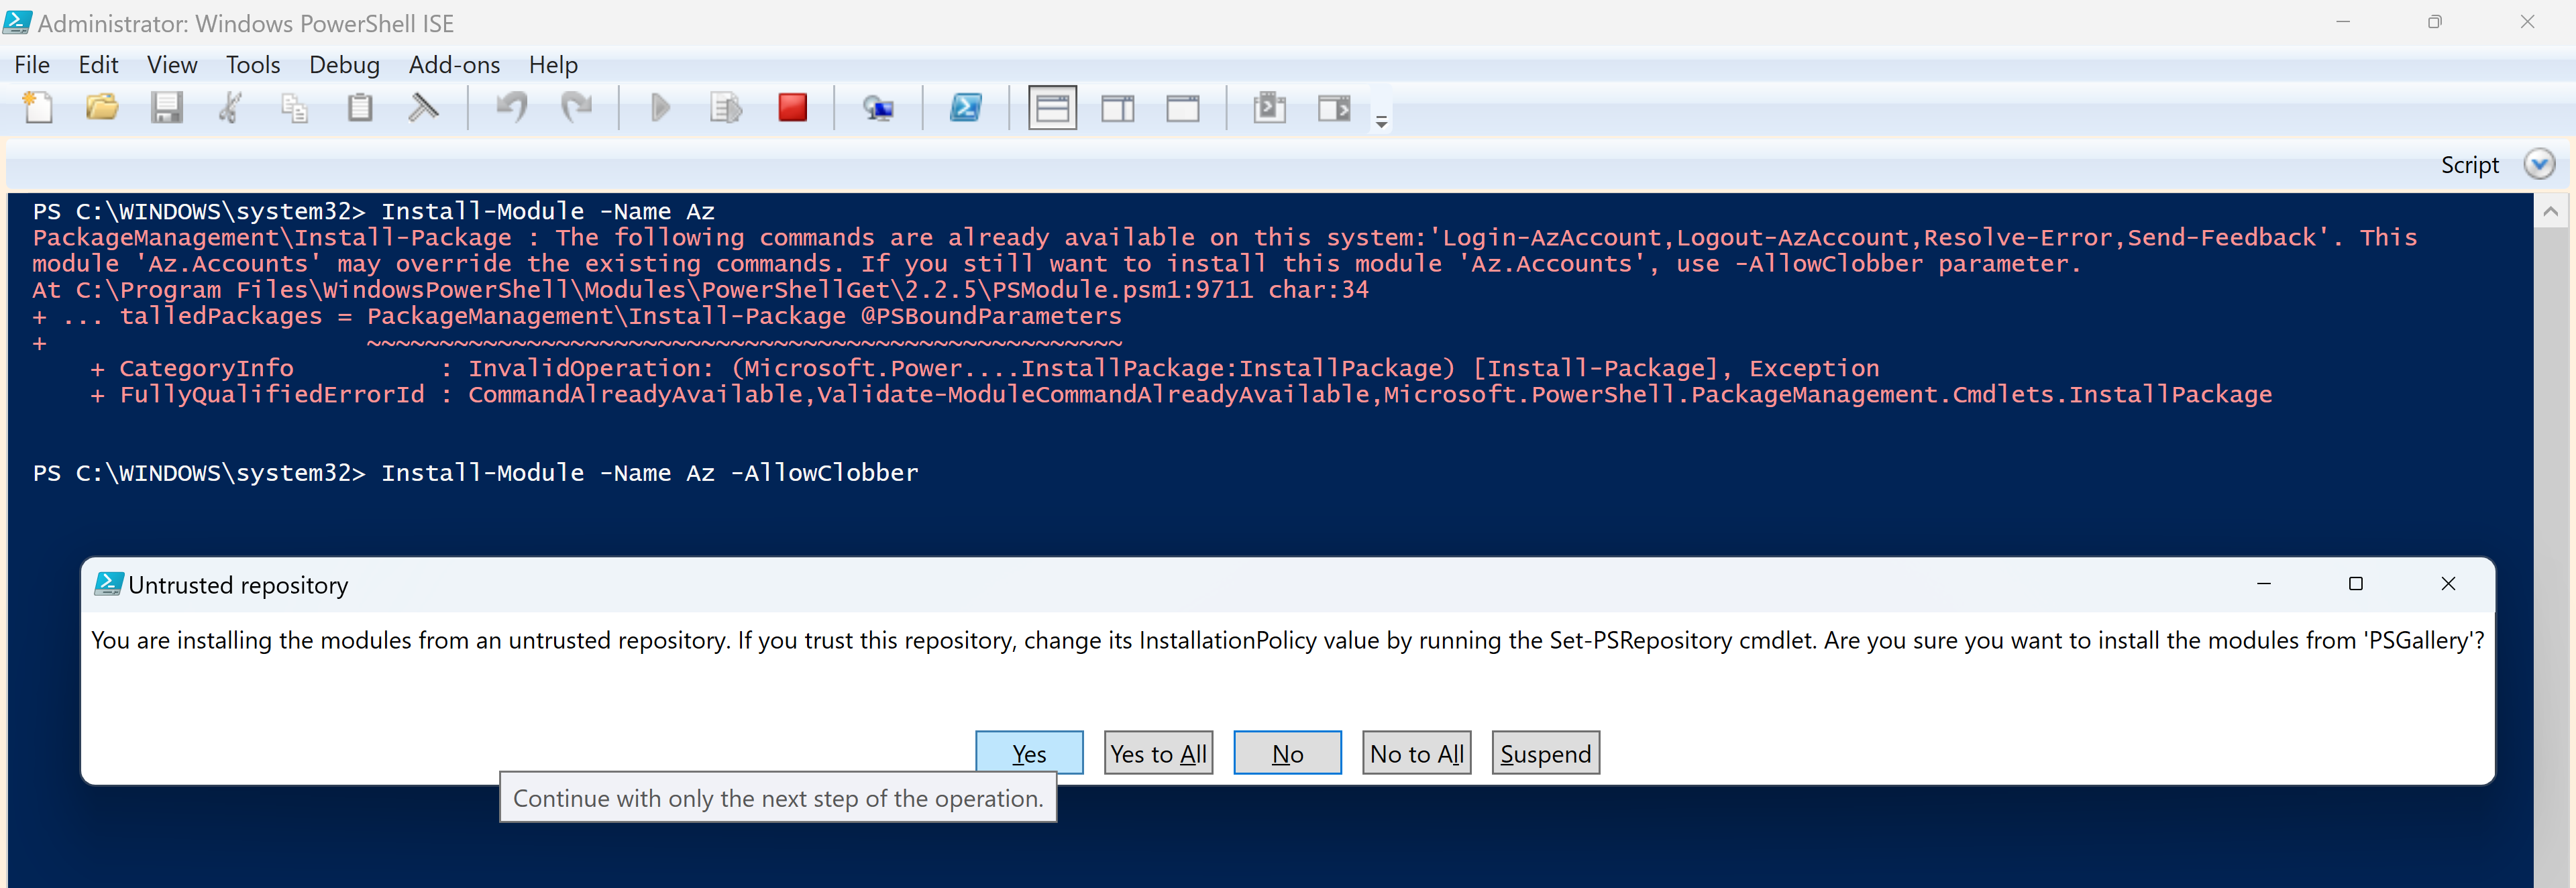
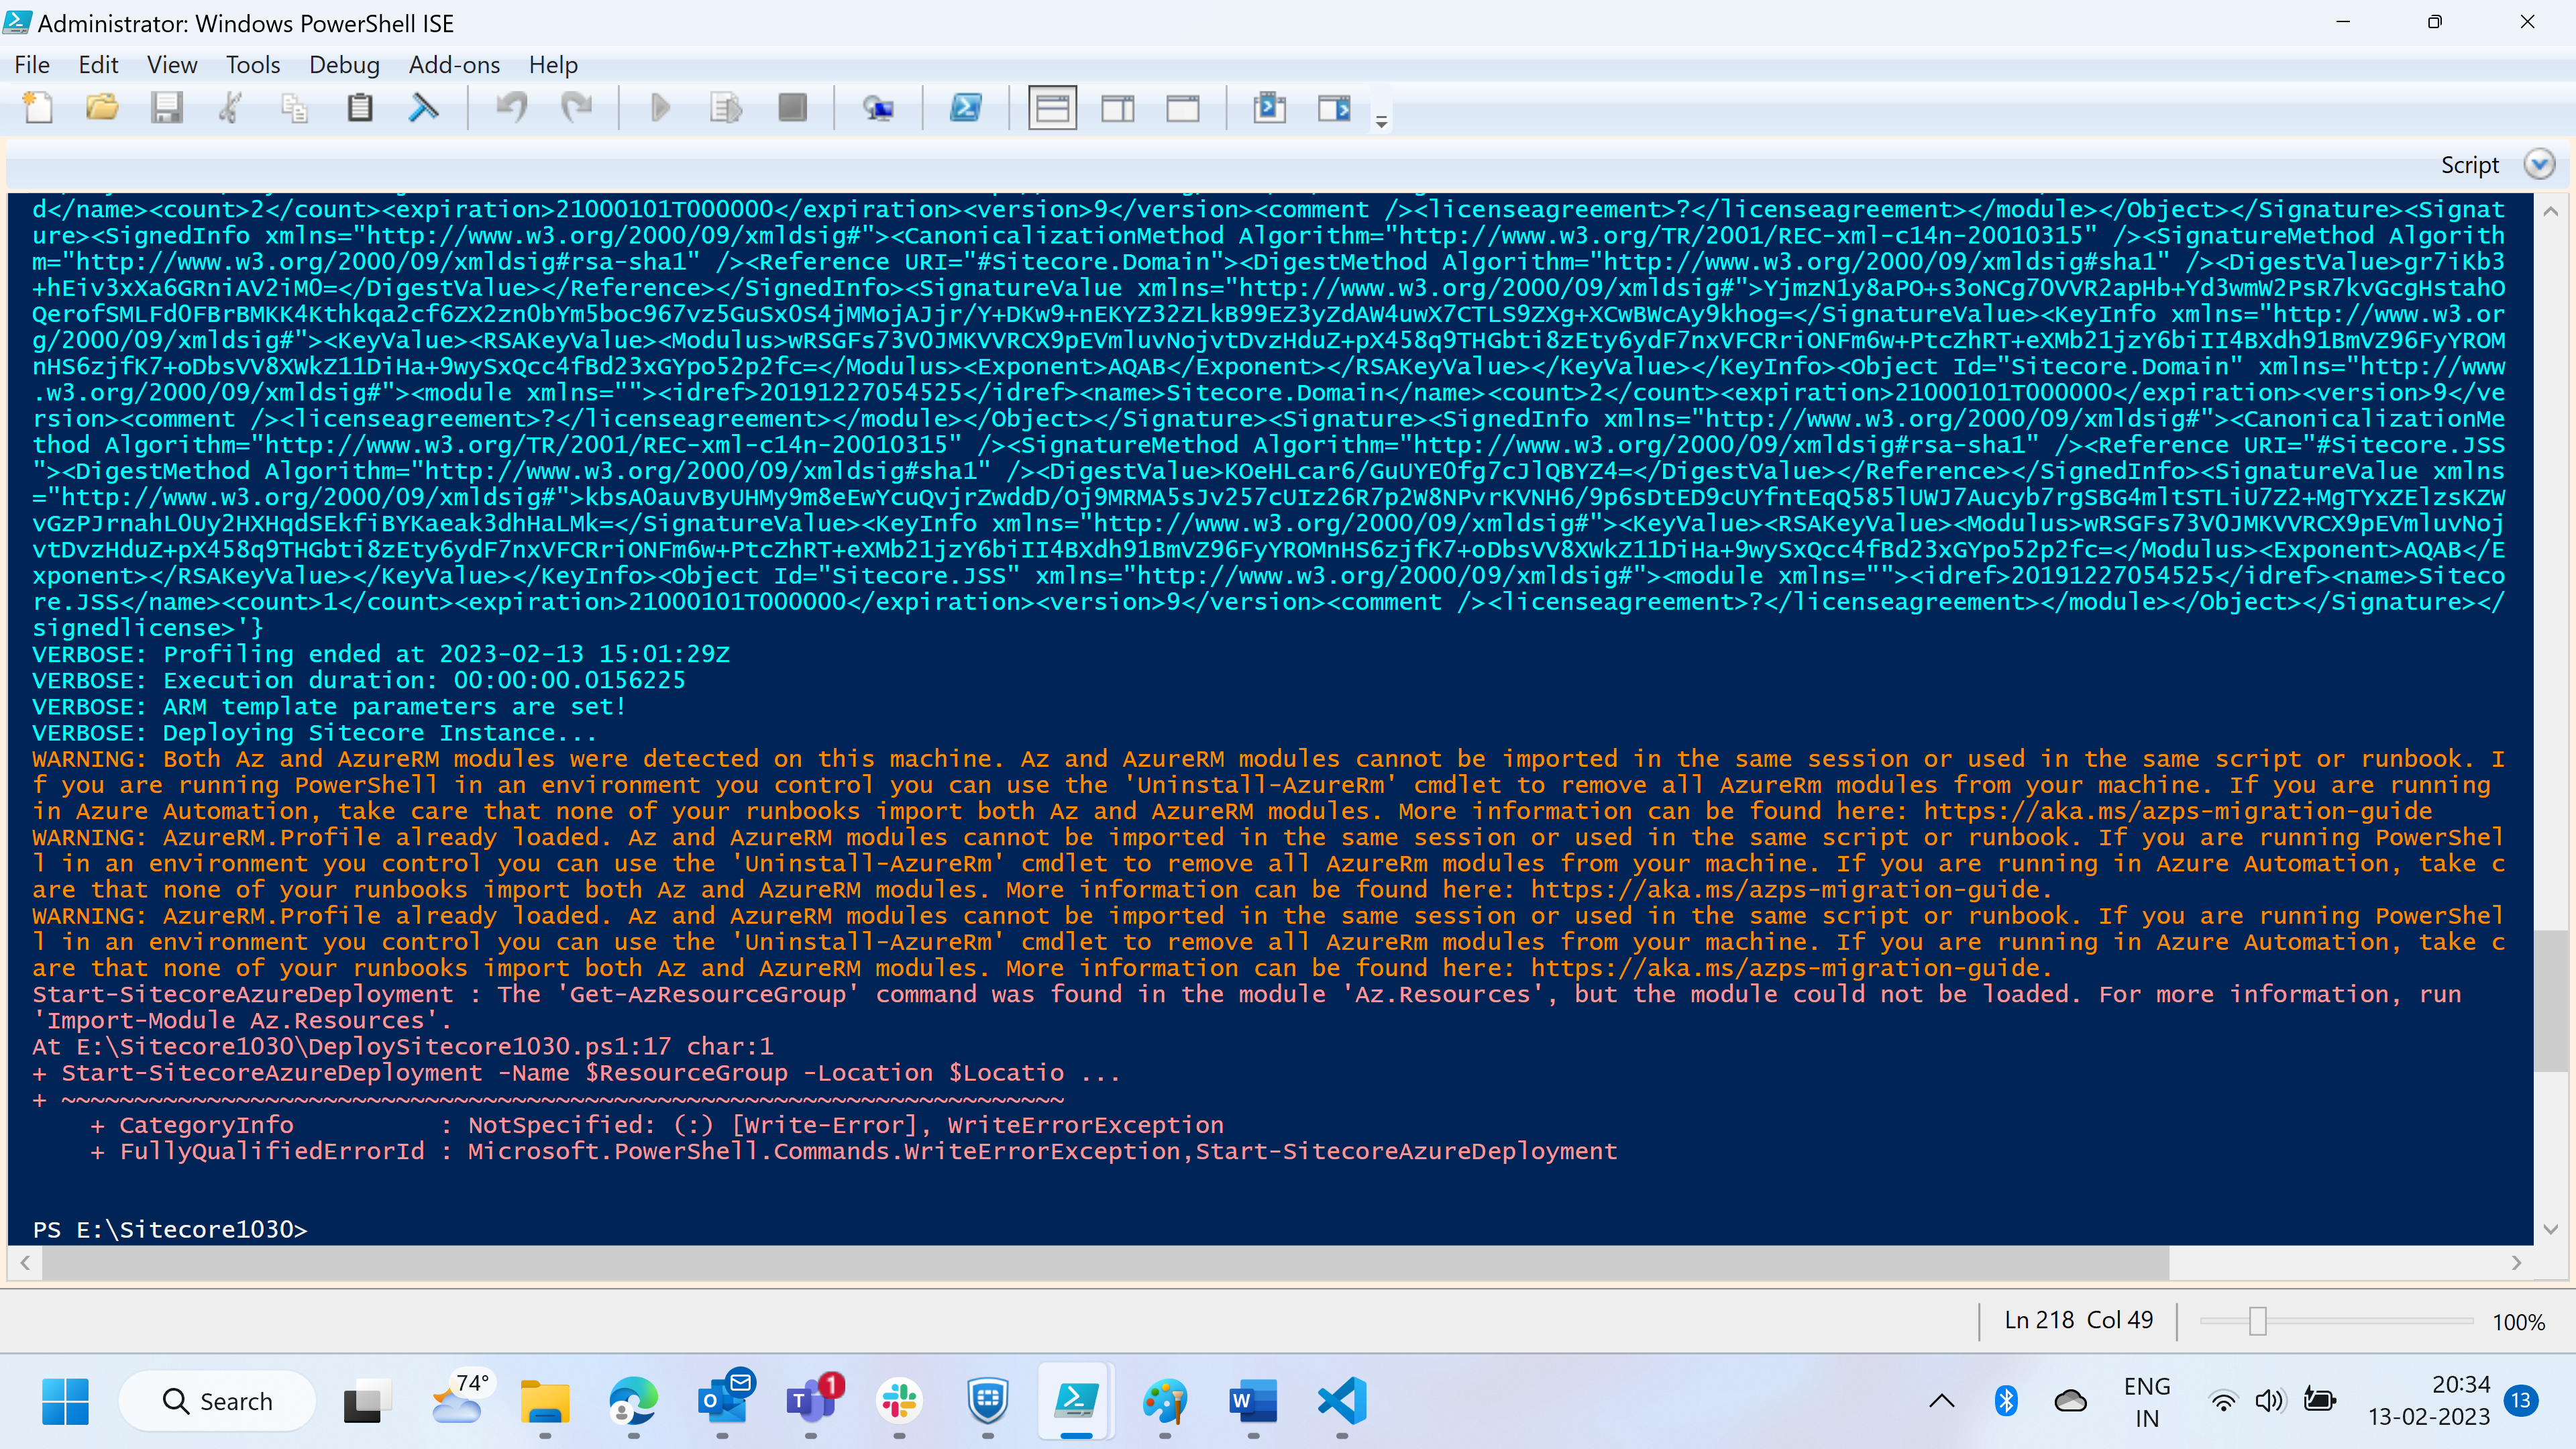
Error: Both AZ and AzureRM modules are detected in your system. How to fix that?

I encountered the below issue while doing the deployment. To fix this I need to uninstall AzureRM as AZ is the latest one used for Azure deployment.

Thank you!

Friday, 20 January 2023

Step by Step installation of Sitecore 10.3 on Docker

January 20, 2023 2


In this document, we will learn how to setup Sitecore 10.3 on docker desktop in Windows 11. We shall briefly cover the step-by-step process and overview of Sitecore 10.3 setup.

While doing the installation in my windows, I followed Installation Guide for Developer Workstation with Containers. Thanks, Sitecore Team!

Prerequisites -

To setup Sitecore 10.3 on docker, we shall need the following -

  • Docker Desktop Installed on Windows Desktop
  • Docker Desktop support for windows containers
  • 16 GB of RAM
  • Approximately 50GB of free disk space for Sitecore container images. SSD storage is highly recommended.
  • The default Sitecore container configuration uses specific ports. To avoid any conflicts, we should ensure the following ports are not being used by another process: 443, 8079, 8081, 8984, and 14330

To check the prerequisites for Sitecore 10.3 installation, please check the below link -
Support Information - Sitecore compatibility table for Sitecore XP 9.0 and later

Setup Files -

  • Docker-compose.yaml
  • Env file
  • compose-init.ps1

Installation Steps:

  1. Setup docker desktop
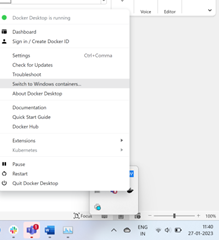
    Run docker, then right click on the docker icon in the right bottom panel, select "Switch to Windows containers".
  2. Create a new folder D:\sc1030_install and download and unzip Container Deployment Package
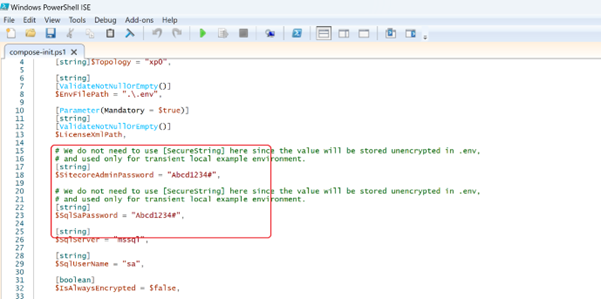
  3. Open Compose-init.ps1 file from D:\sc1030_install\SitecoreContainerDeployment.10.3.0.008463.1135\compose\ltsc2019\xp0 folder and make the below changes. Please provide correct MS SQL password.
  4. Please copy License file in D:\license\license.xml
  5. Open PowerShell as administrator. Change the directory to D:\sc1030_install\SitecoreContainerDeployment.10.3.0.008463.1135\compose\ltsc2019\xp0
  6. Execute .\compose-init.ps1 -LicenseXmlPath C:\license\license.xml
    This script will set up all the environment variables in .env file.
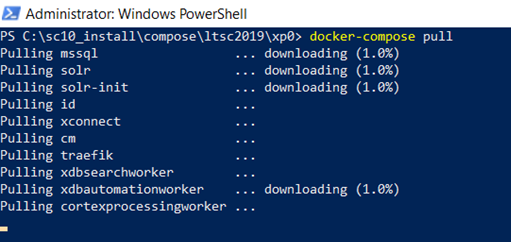
  7. Execute Docker-compose up – detach
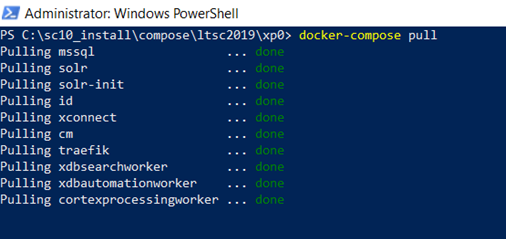
    This should pull images from Sitecore Docker Repository
    After pull, extraction of images is complete. The containers will be deployed.
    The scripts should run for around 30 mins depending on the network.
    SitecoreDockerSetupSitecore Setup in Docker Step by Step
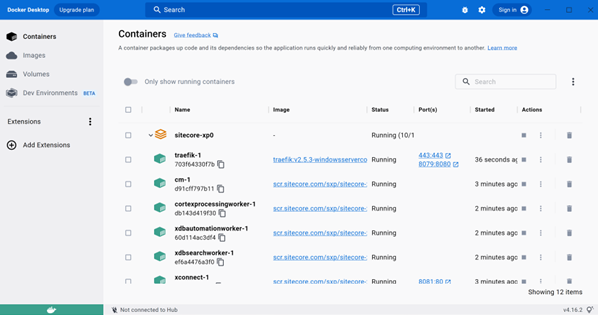
  8. Open Docker Dashboard and you should see Sitecore-XP0 running.
    Docker Desktop
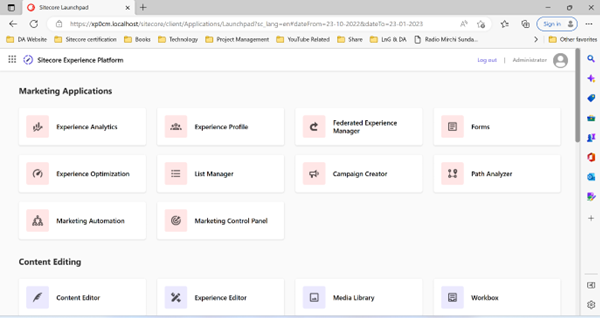
  9. Browse the site.
    Sitecore 10 Site

FAQ

How to get into wwwroot of docker containers?

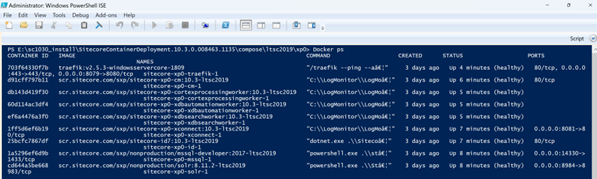
Execute “Docker ps” to get the list of containers and note the container name.
Docker Root
Now execute “docker exec -it $containerName.

How to log into SQL Server using SSMS?

Note down the port number of SQL Container. Now open SSMS, Enter “localhost, portNumber” in server and login with sa credentials.